Belted Kingfisher

Color Fringing Fungus: An Example of Chromatic Aberration by Todd Henson

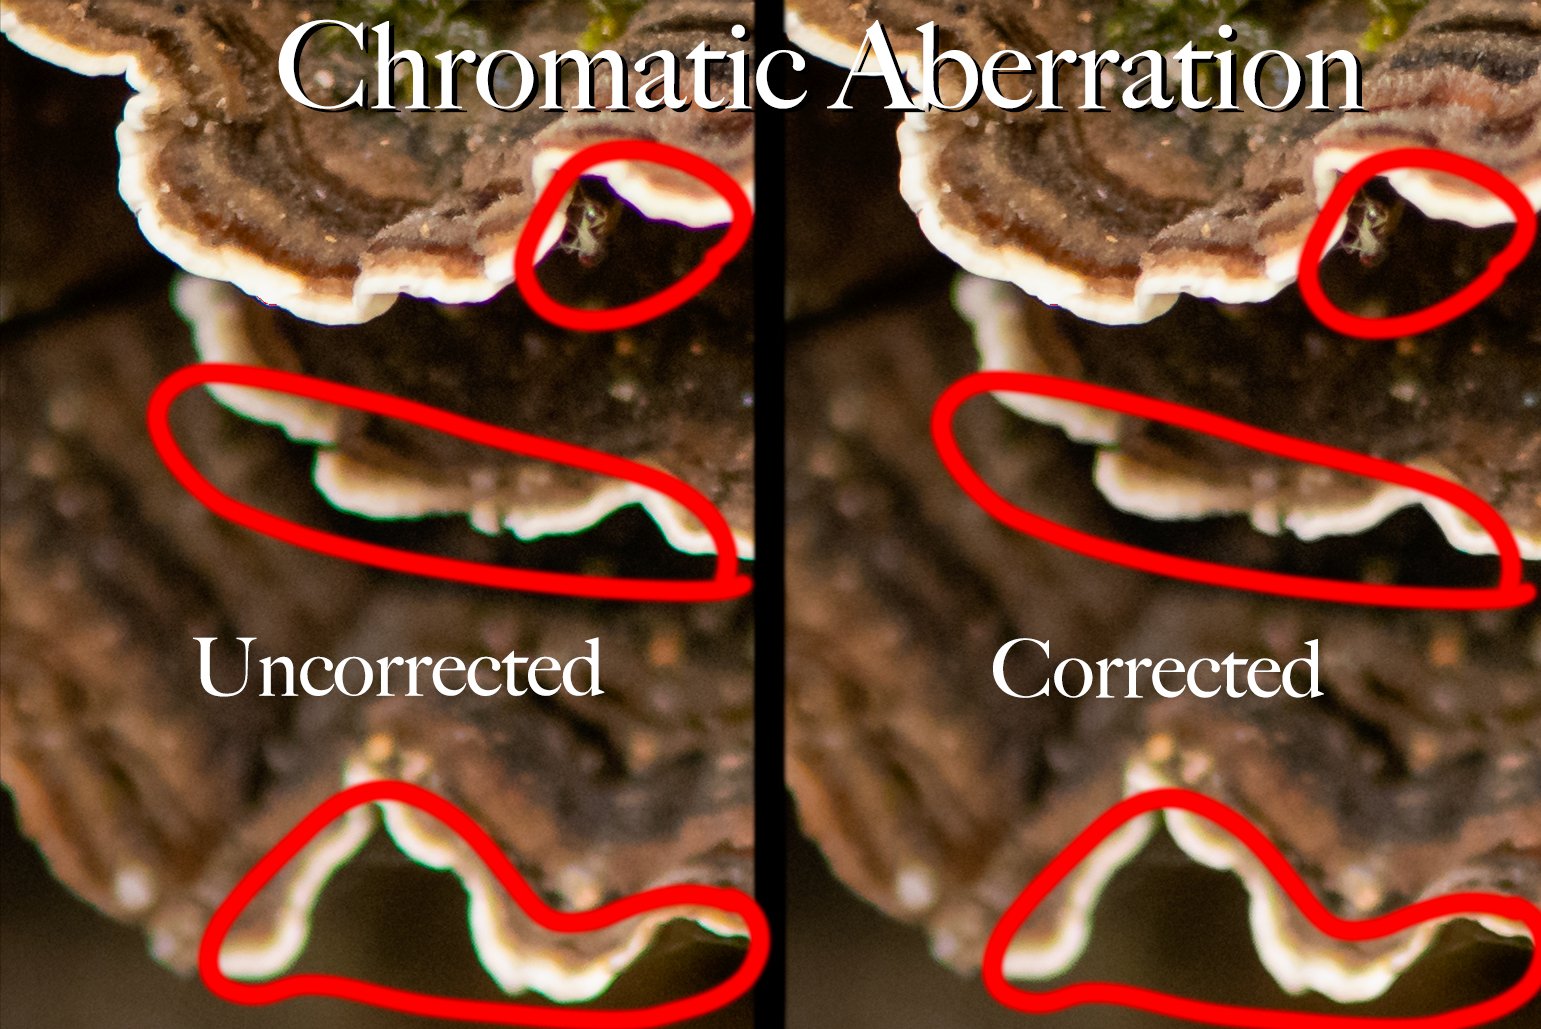
Side by side example of chromatic aberration

Today I wanted to tackle the topic of chromatic aberration, what it is, and how to attempt to correct it. Please click on all the photos in this post to see larger versions.

What is Chromatic Aberration?

This topic has the potential to get very technical as chromatic aberration, also called color fringing, is something caused by the optical physics of lenses. But I don’t want to get too technical, so a simple description is that chromatic aberration is unwanted bands of color, most often along the edges of objects in the photo and often when there is strong contrast between light and dark areas. It’s best to start with an example, so look at the closeup photo below of some fungus where I’ve circled the areas showing chromatic aberration.

A closeup showing chromatic aberration in regions where light and dark meet

See how the top section has a band of magenta color along the lower edge of the light band on the fungus, right where it transitions from light fungus to dark background? In the middle and lower sections the fringing is in the form of bands of green color. Neither the magenta nor the green are a natural part of this scene. They are distortions caused by imperfections and limitations in the lens.

Chromatic aberration is generally more likely to occur when using wider apertures, so you can reduce or eliminate it by stopping down to a smaller aperture. But sometimes this won’t create the photo you’re trying for and you need to use a wider aperture. In those cases you may end up with some color fringing. Thankfully, today’s software provides methods to correct this.

Auto Correcting Chromatic Aberration

I used Adobe Lightroom for these examples. This is from an older version so it’s possible the options may look different on the version you have but the concept is the same.

Shows I’ve checked Remove Chromatic Aberration and Enable Profile Corrections under the Profile section of Lens Corrections in Lightroom.

Lightroom provides a means of automatically correcting chromatic aberration, and in this case it was done by checking a checkbox labelled Remove Chromatic Aberration within the Profile section of Lens Corrections. I also check Enable Profile Corrections to correct other sorts of lens distortions. Sometimes Lightroom does a great job and this is all I need to do. But as we’ll see, sometimes it doesn’t correct as much of the color fringing as I’d like.

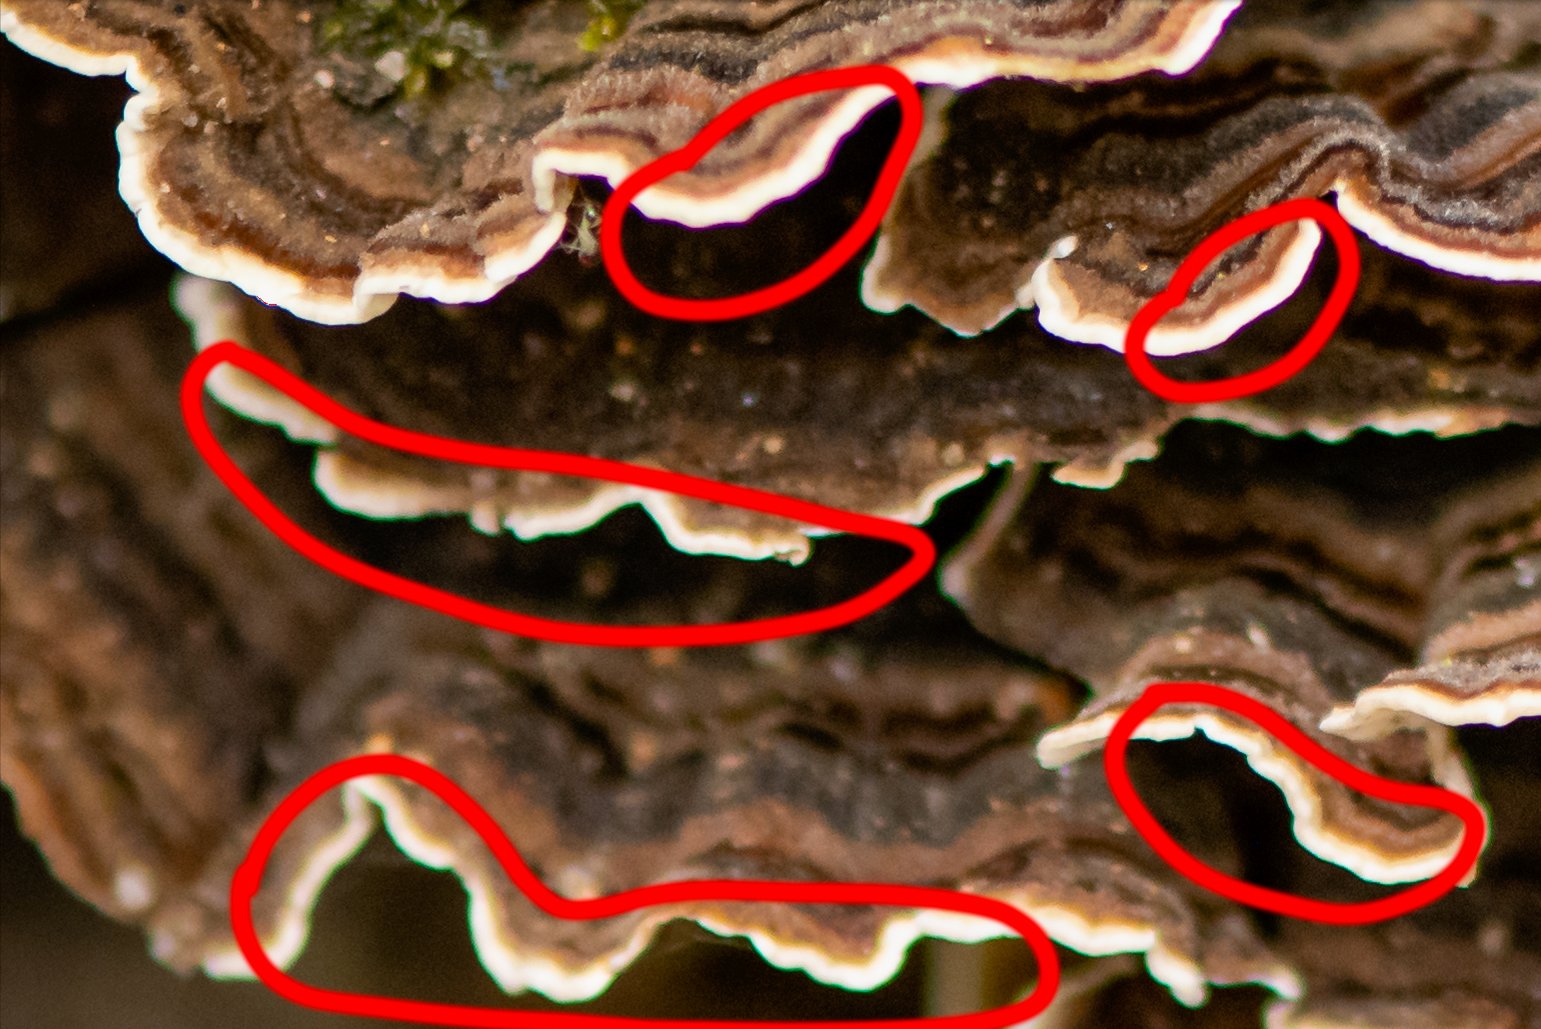
Below are examples showing the uncorrected closeup followed by an attempt at Lightroom’s autocorrection of chromatic aberration with specific sections circled in red to show the color fringing. Notice, even after the correction there still is a fair bit of color fringing.

Shows the uncorrected sections with chromatic aberration

Shows the autocorrected sections. Note, there is still noticeable color fringing.

Below is a slideshow of the above two images. Click on the photo to cycle between uncorrected and autocorrected.
Manually Correcting Chromatic Aberration

I wanted to remove more of the color fringing than Lightroom did when I checked the Remove Chromatic Aberration box. So I clicked on Manual and used the dropper tool to specifically select the areas of the photo that were showing the strongest color fringing. I did this multiple times, over both the magenta and the green fringing. This told Lightroom the specific color fringing it should attempt to correct.

Shows the default settings for the Manual section of Lens Corrections in Lightroom.

Shows the settings after manually using the dropper tool to select regions with strong color fringing.

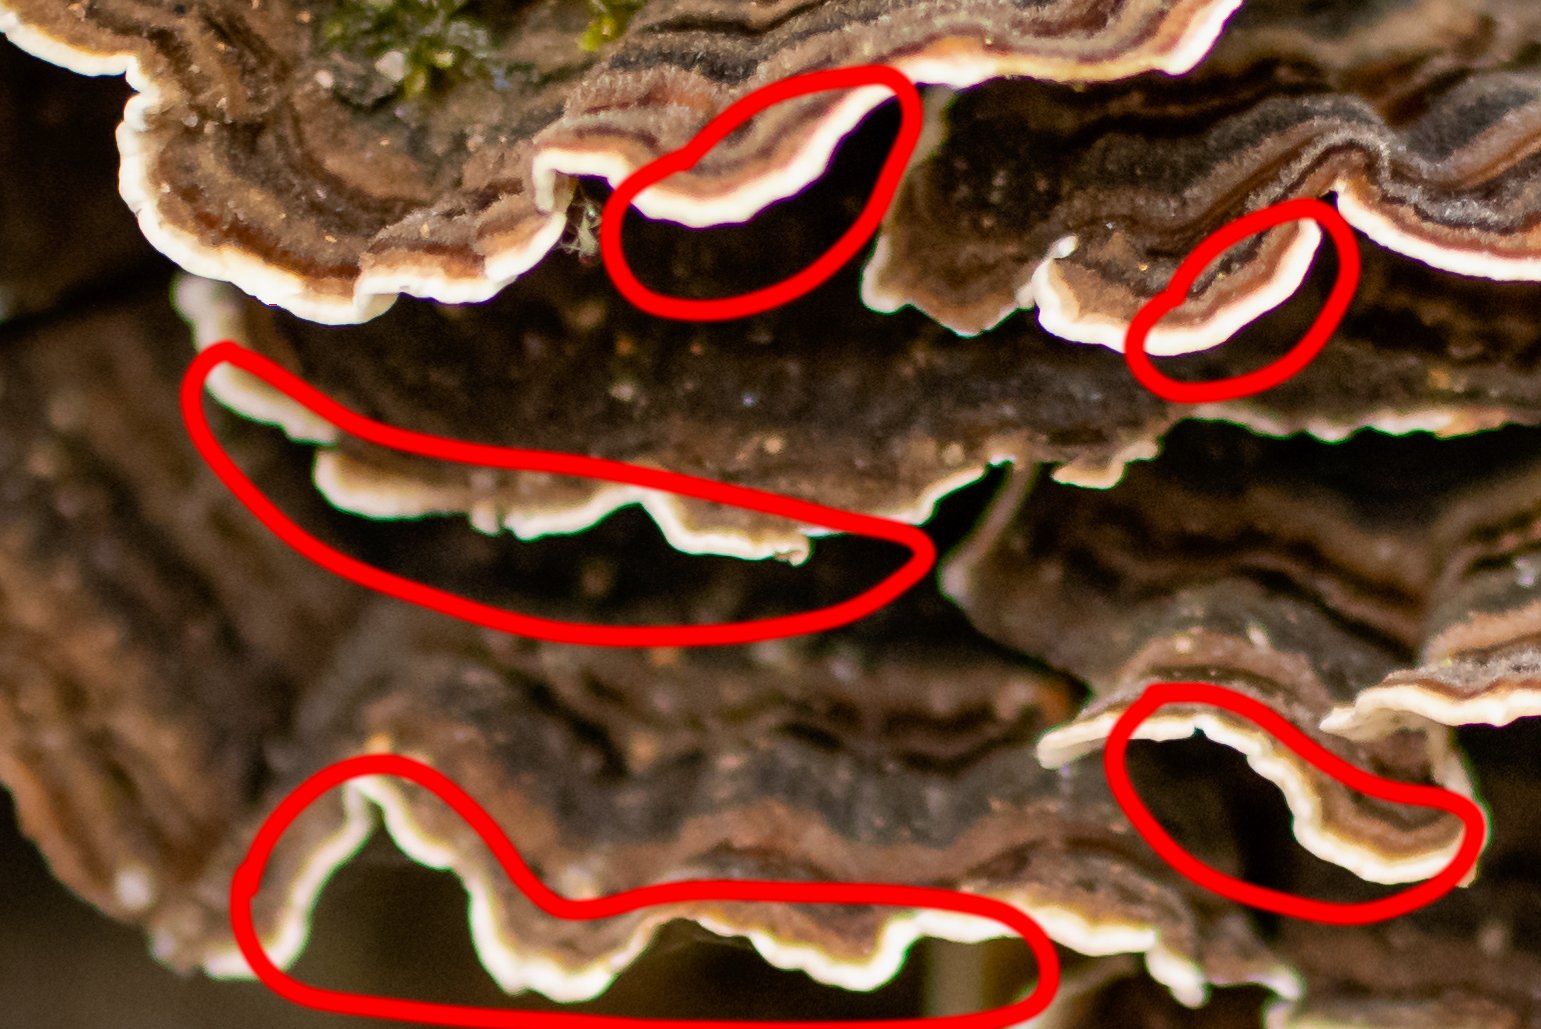
Below are examples showing the uncorrected closeup followed by my attempt at manually correcting the chromatic aberrations. By using the manual dropper I was able to do a much better job at removing the specific color fringing present in this photo.

Shows the uncorrected sections with chromatic aberration

Shows the manually corrected sections. Most color fringing is now gone, or at least reduced.

Below is a slideshow of the above two images. Click on the photo to cycle between uncorrected and manually corrected.

Conclusion

Chromatic aberration won’t be a problem in all photos. In fact, I’d say it’s not a problem in most of my photos. And in many cases when it is present Lightroom does a great job automatically correcting the color fringing. But in special situations, often when I’m doing macro work with wide apertures and subjects with strong regions of contrast between light and dark, chromatic aberration will become a problem and I’ll put a little more effort into manually correcting for it.

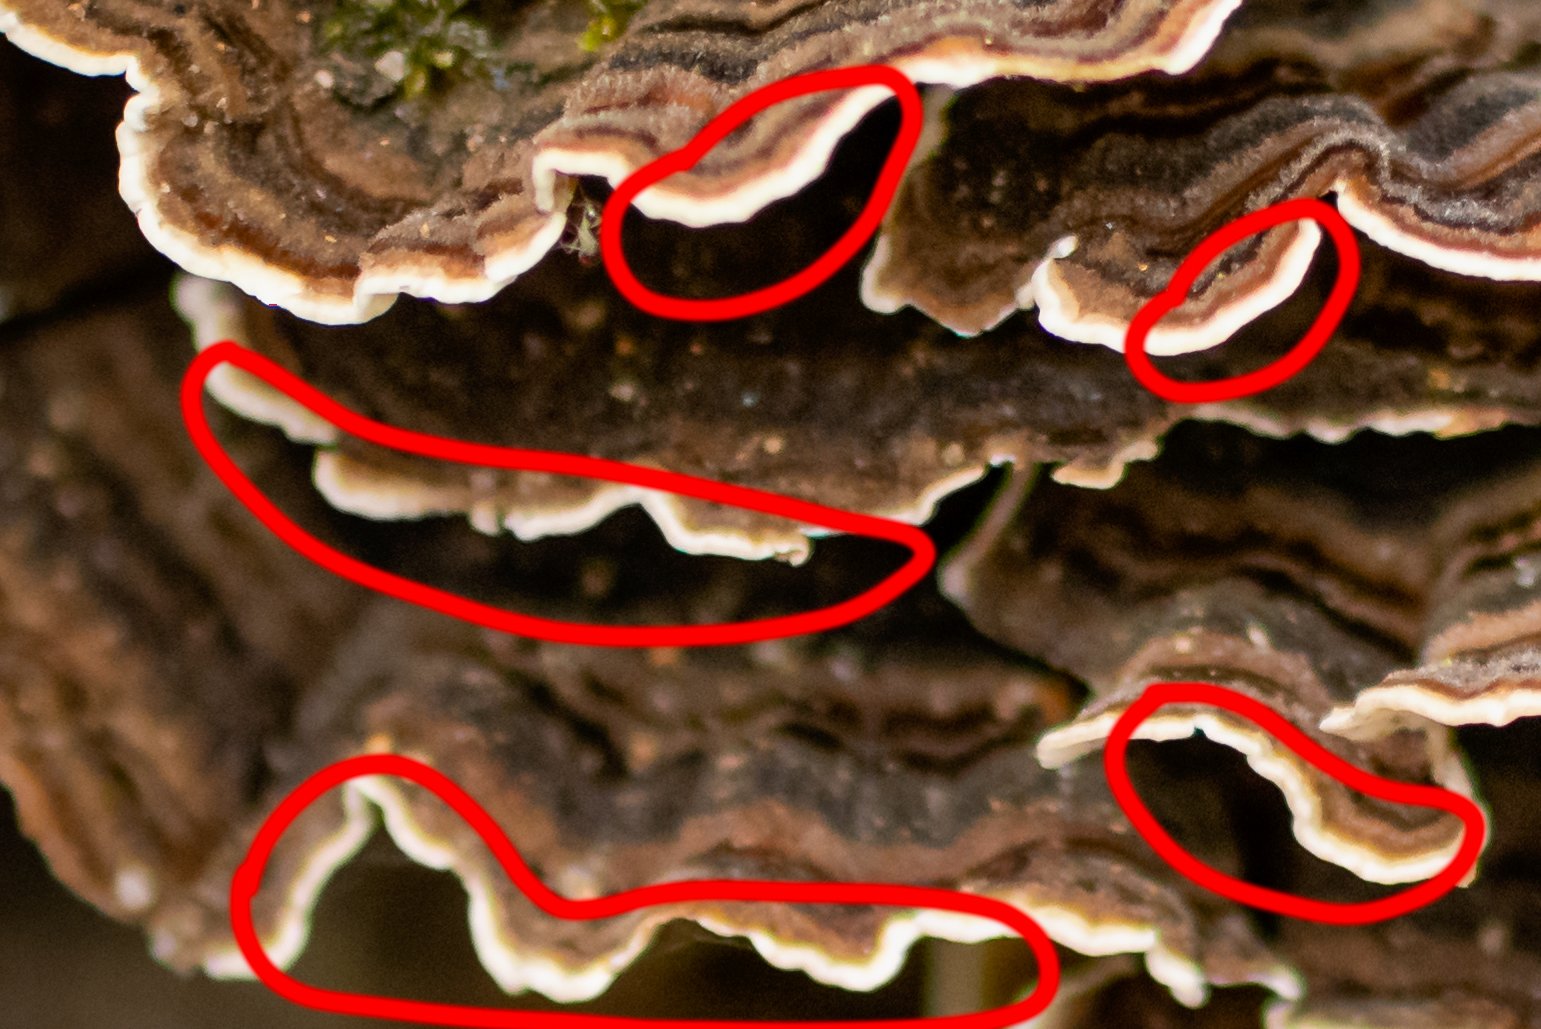
Below is the final photo after manually correcting for chromatic aberration.

The final photo after manually correcting for chromatic aberration.

Bonus: Hidden Flying Insect

Did you happen to notice the tiny little insect hiding in the photo and closeups above? I’d not even seen it until I zoomed way in using Lightroom. Below is another of the closeup images where I’ve circled the little creature in red.

Check out the tiny flying insect on the fungus.


Do you enjoy these posts?

Sign up to receive periodic emails with updates and thoughts. Don’t worry, I won’t spam you. And please consider purchasing artwork or products from my online store, and using my affiliate links in the sidebar to the right when shopping online.

I appreciate your support!

Painterly Kingfisher in Flight by Todd Henson

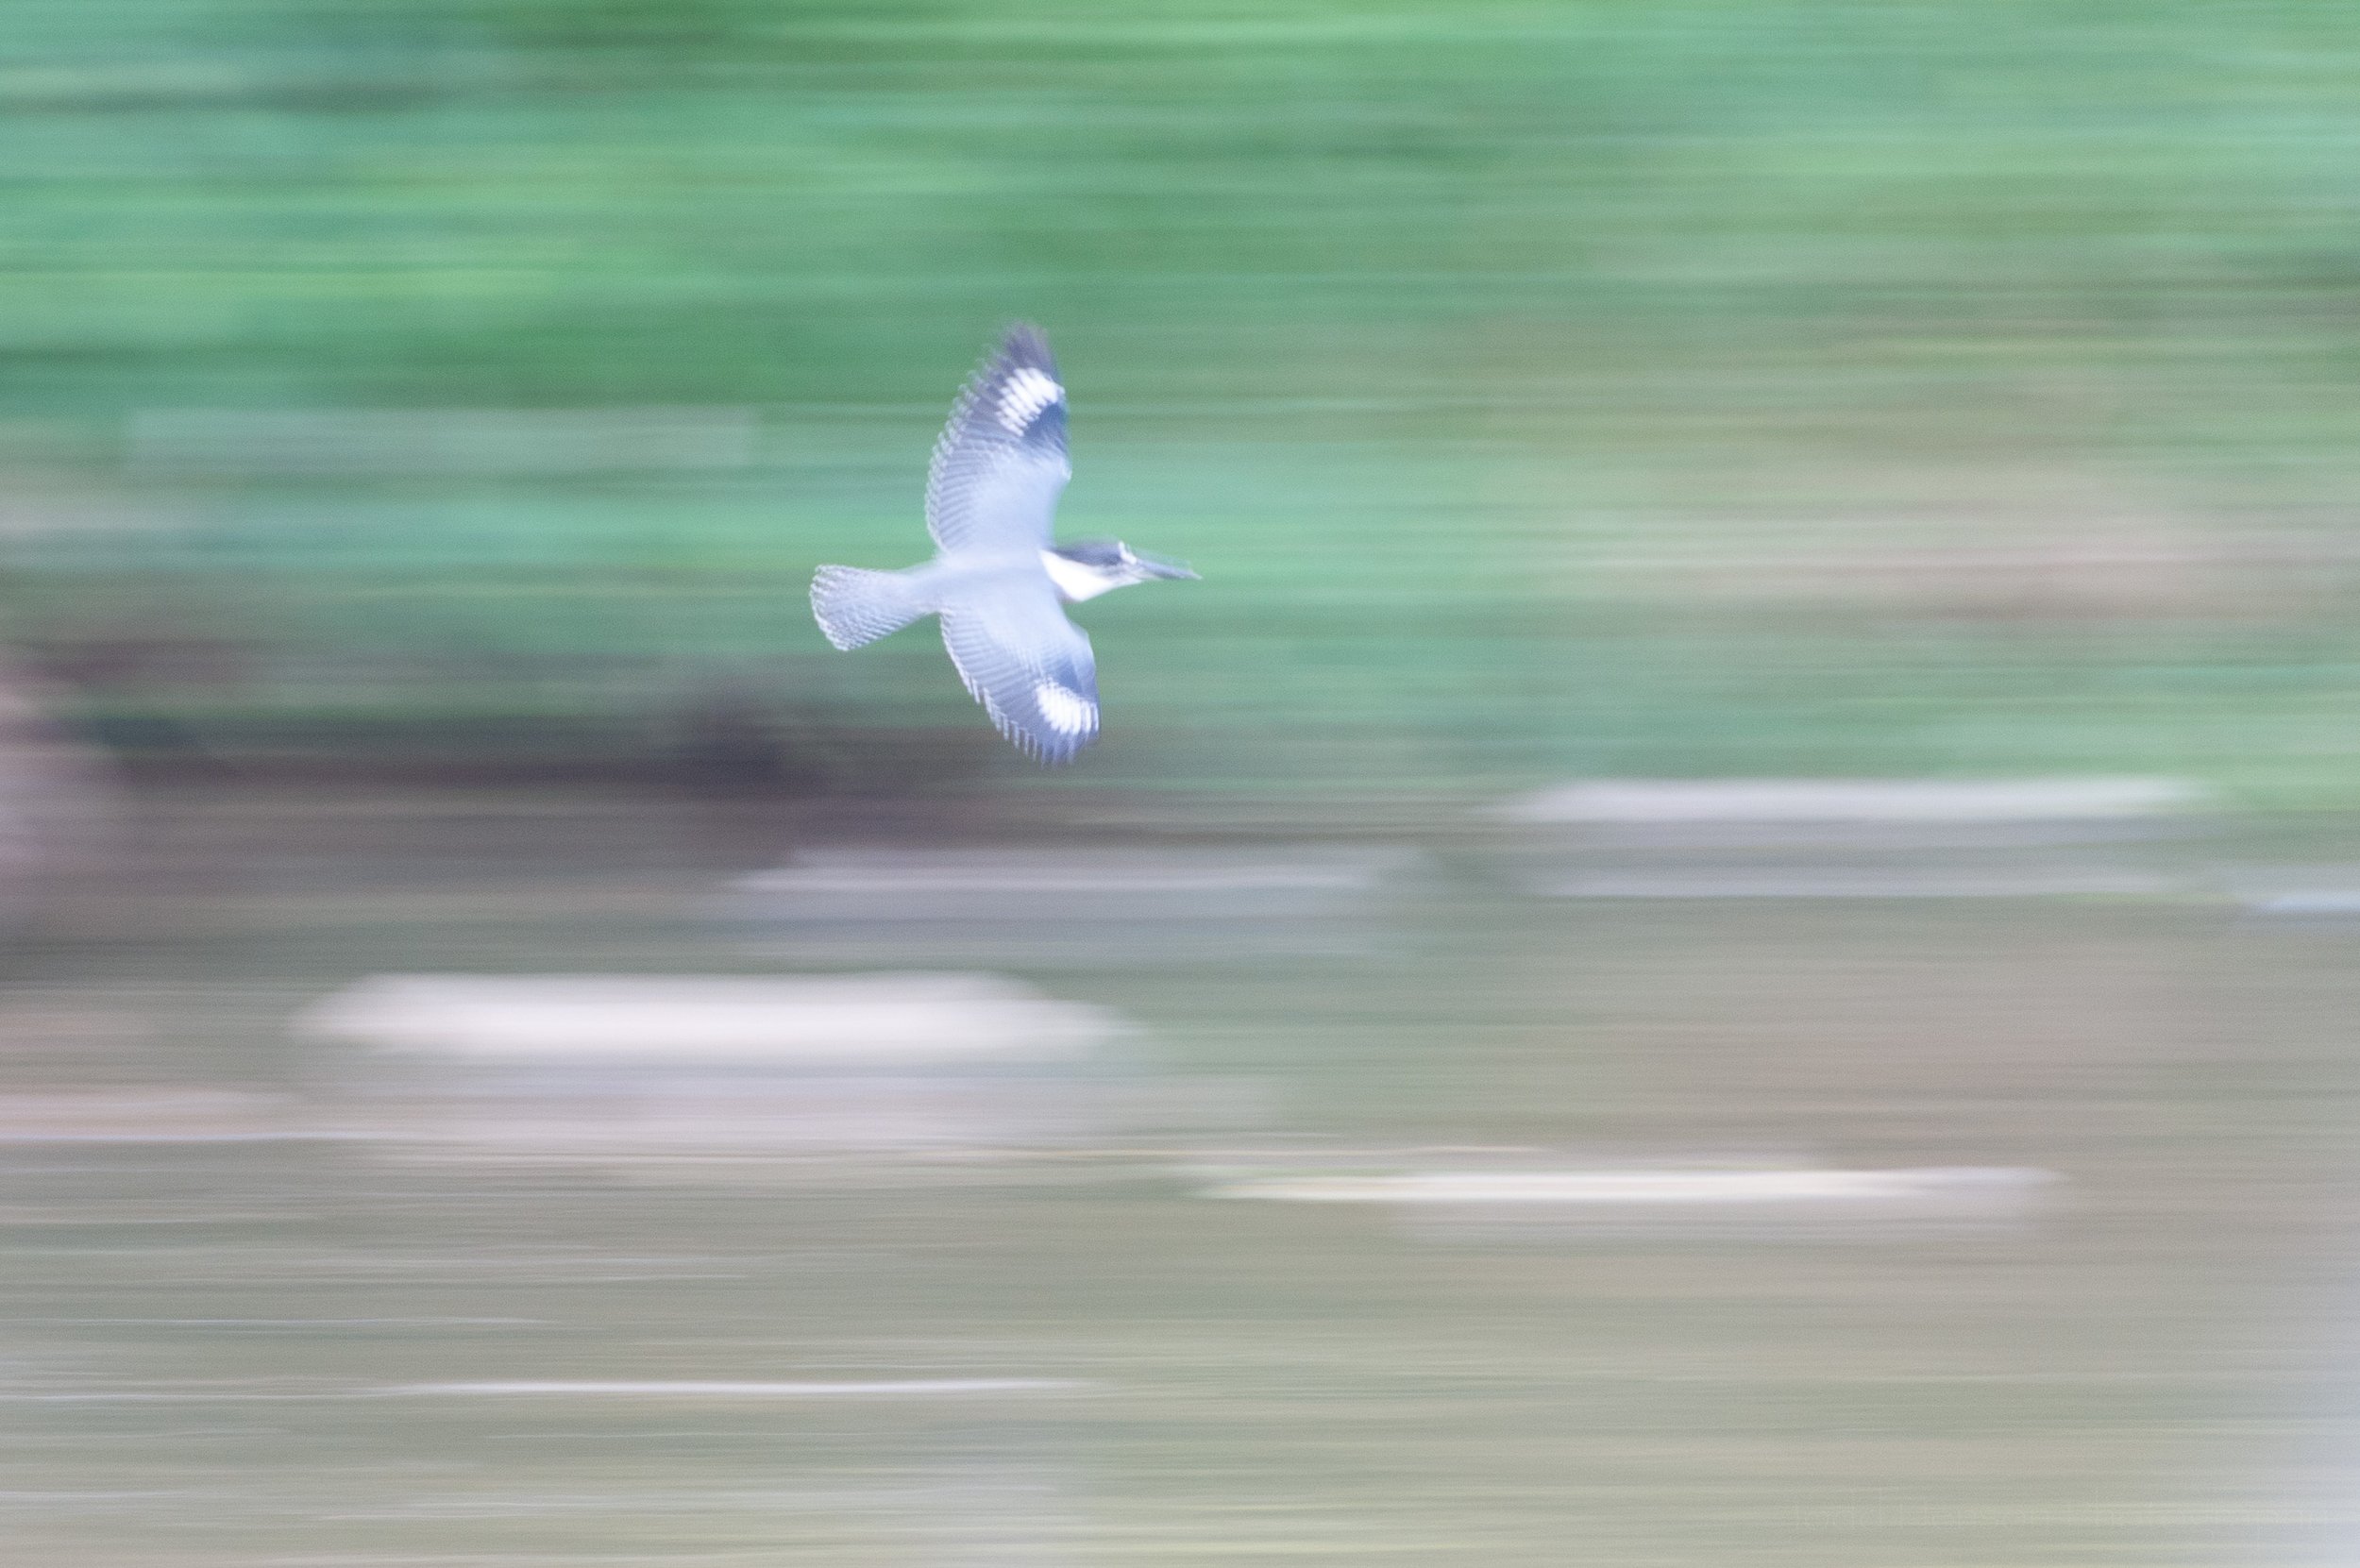
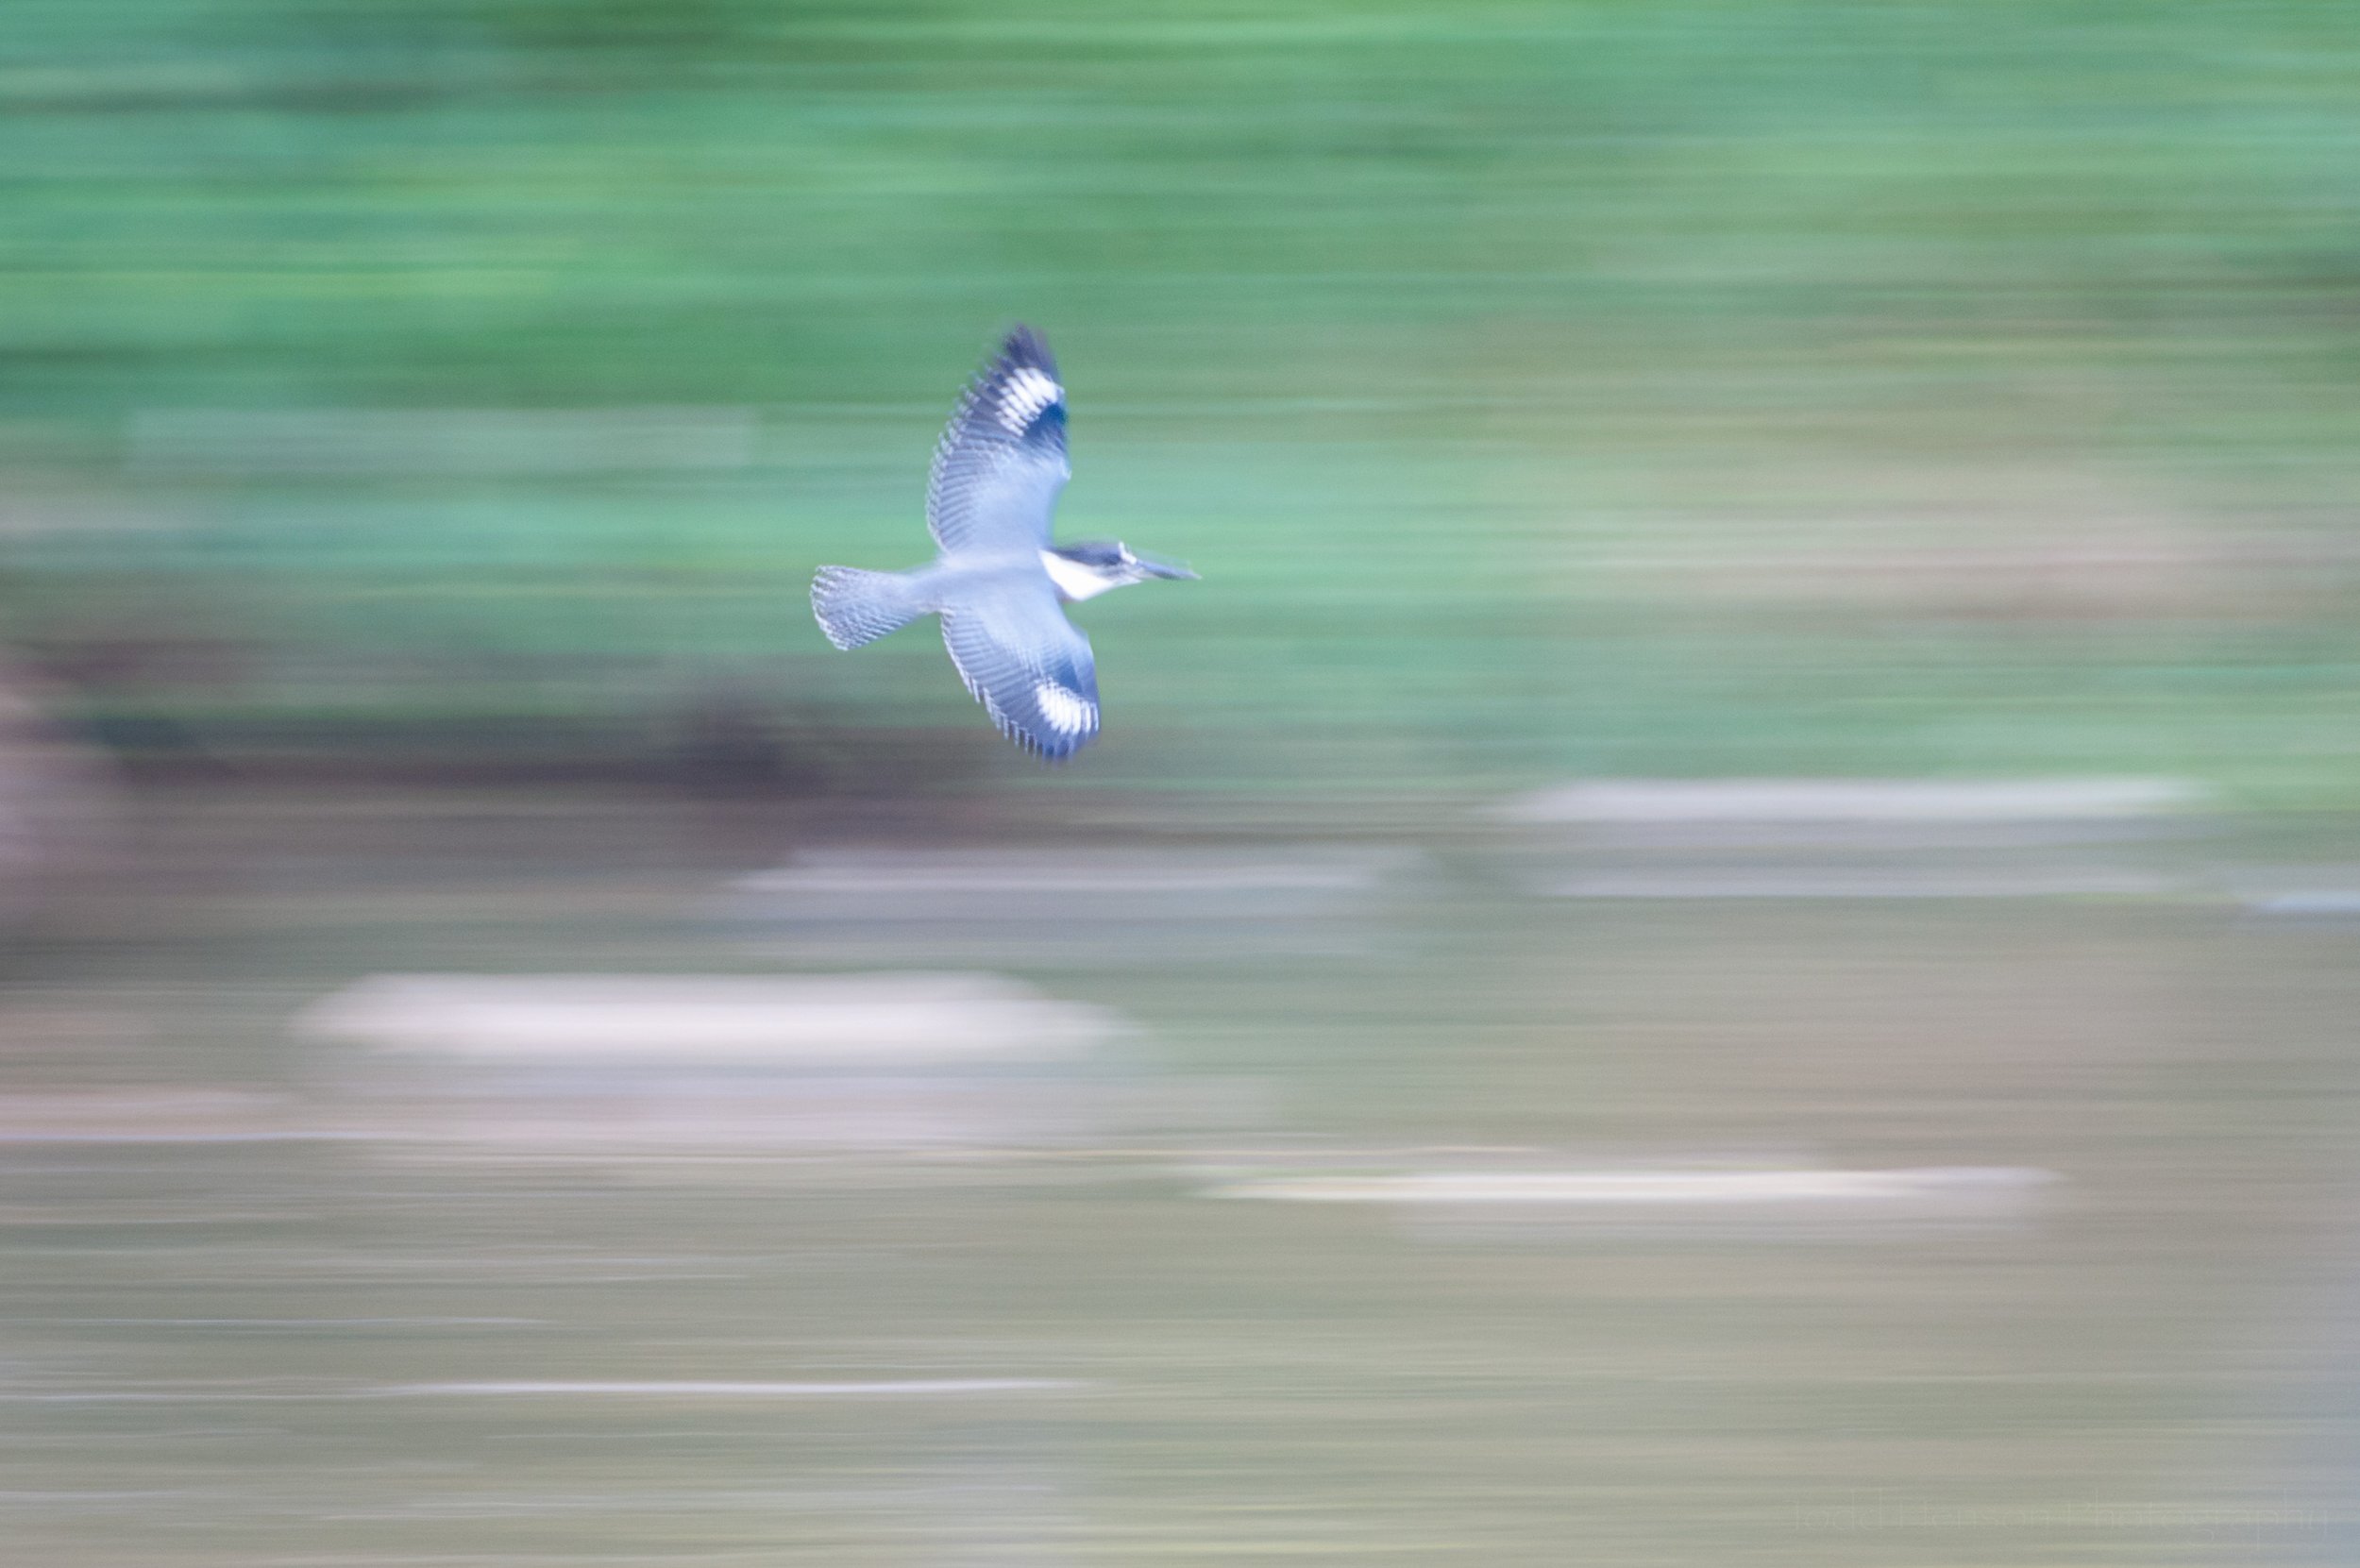
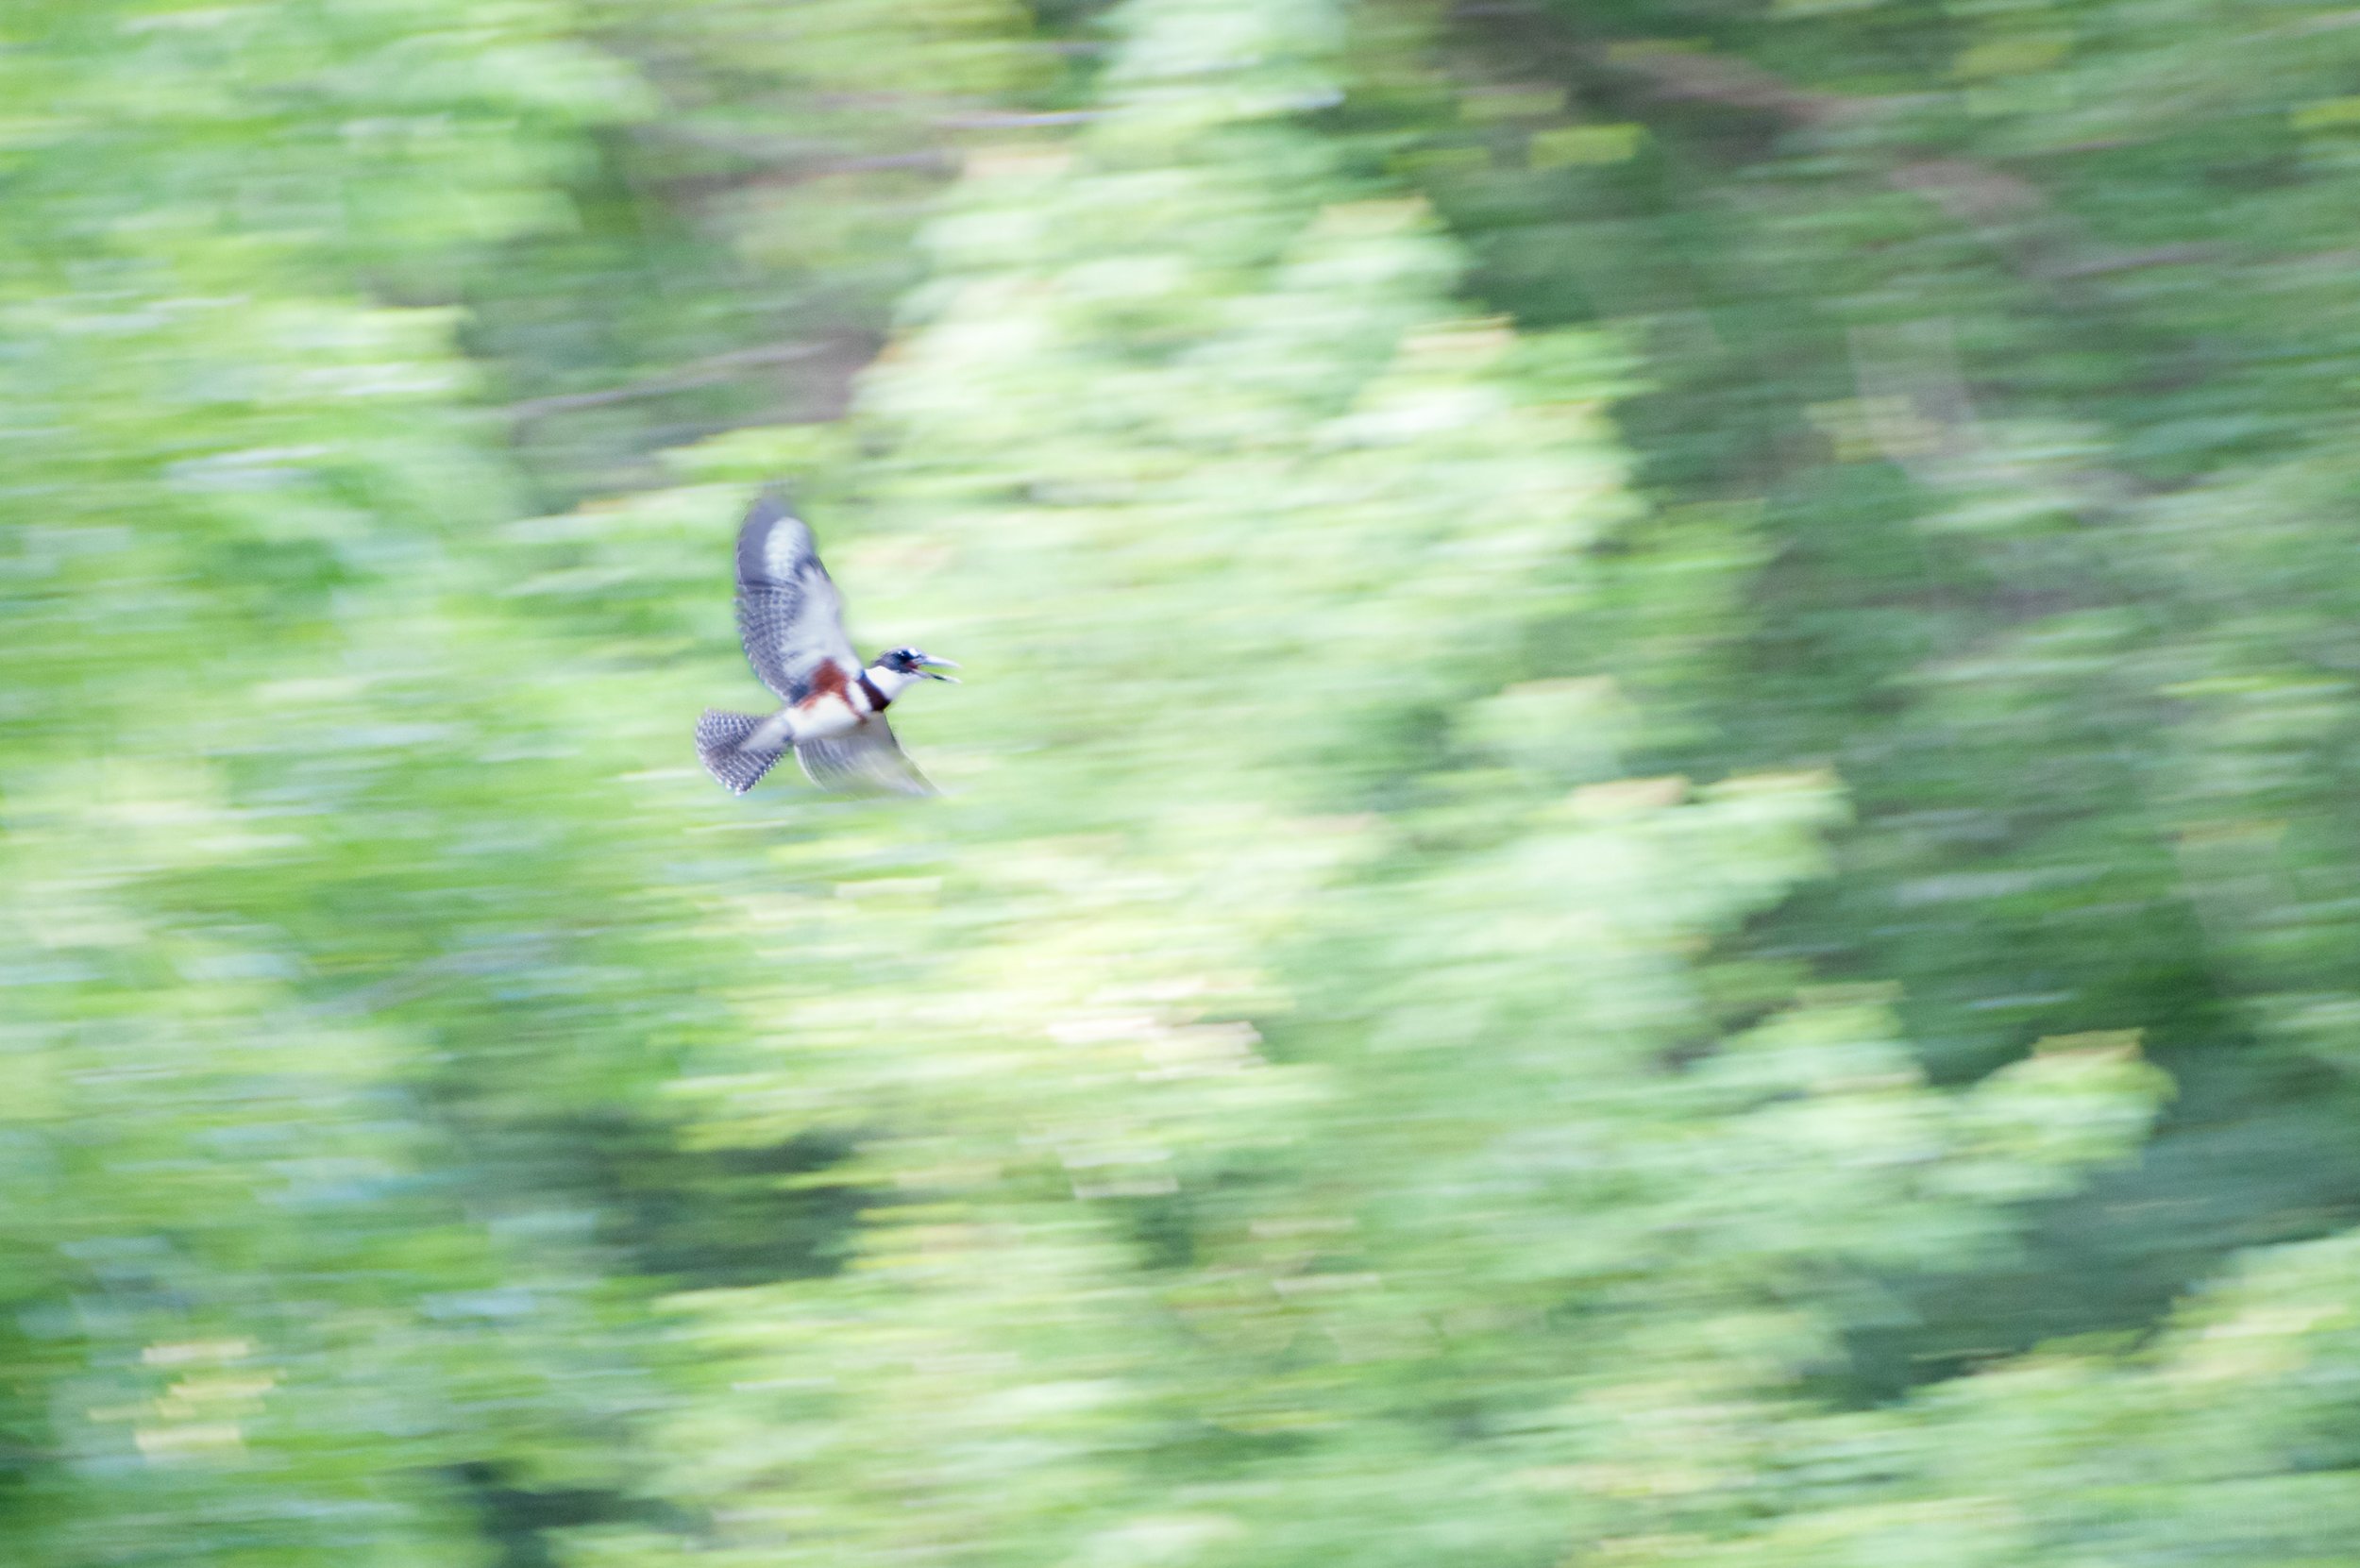
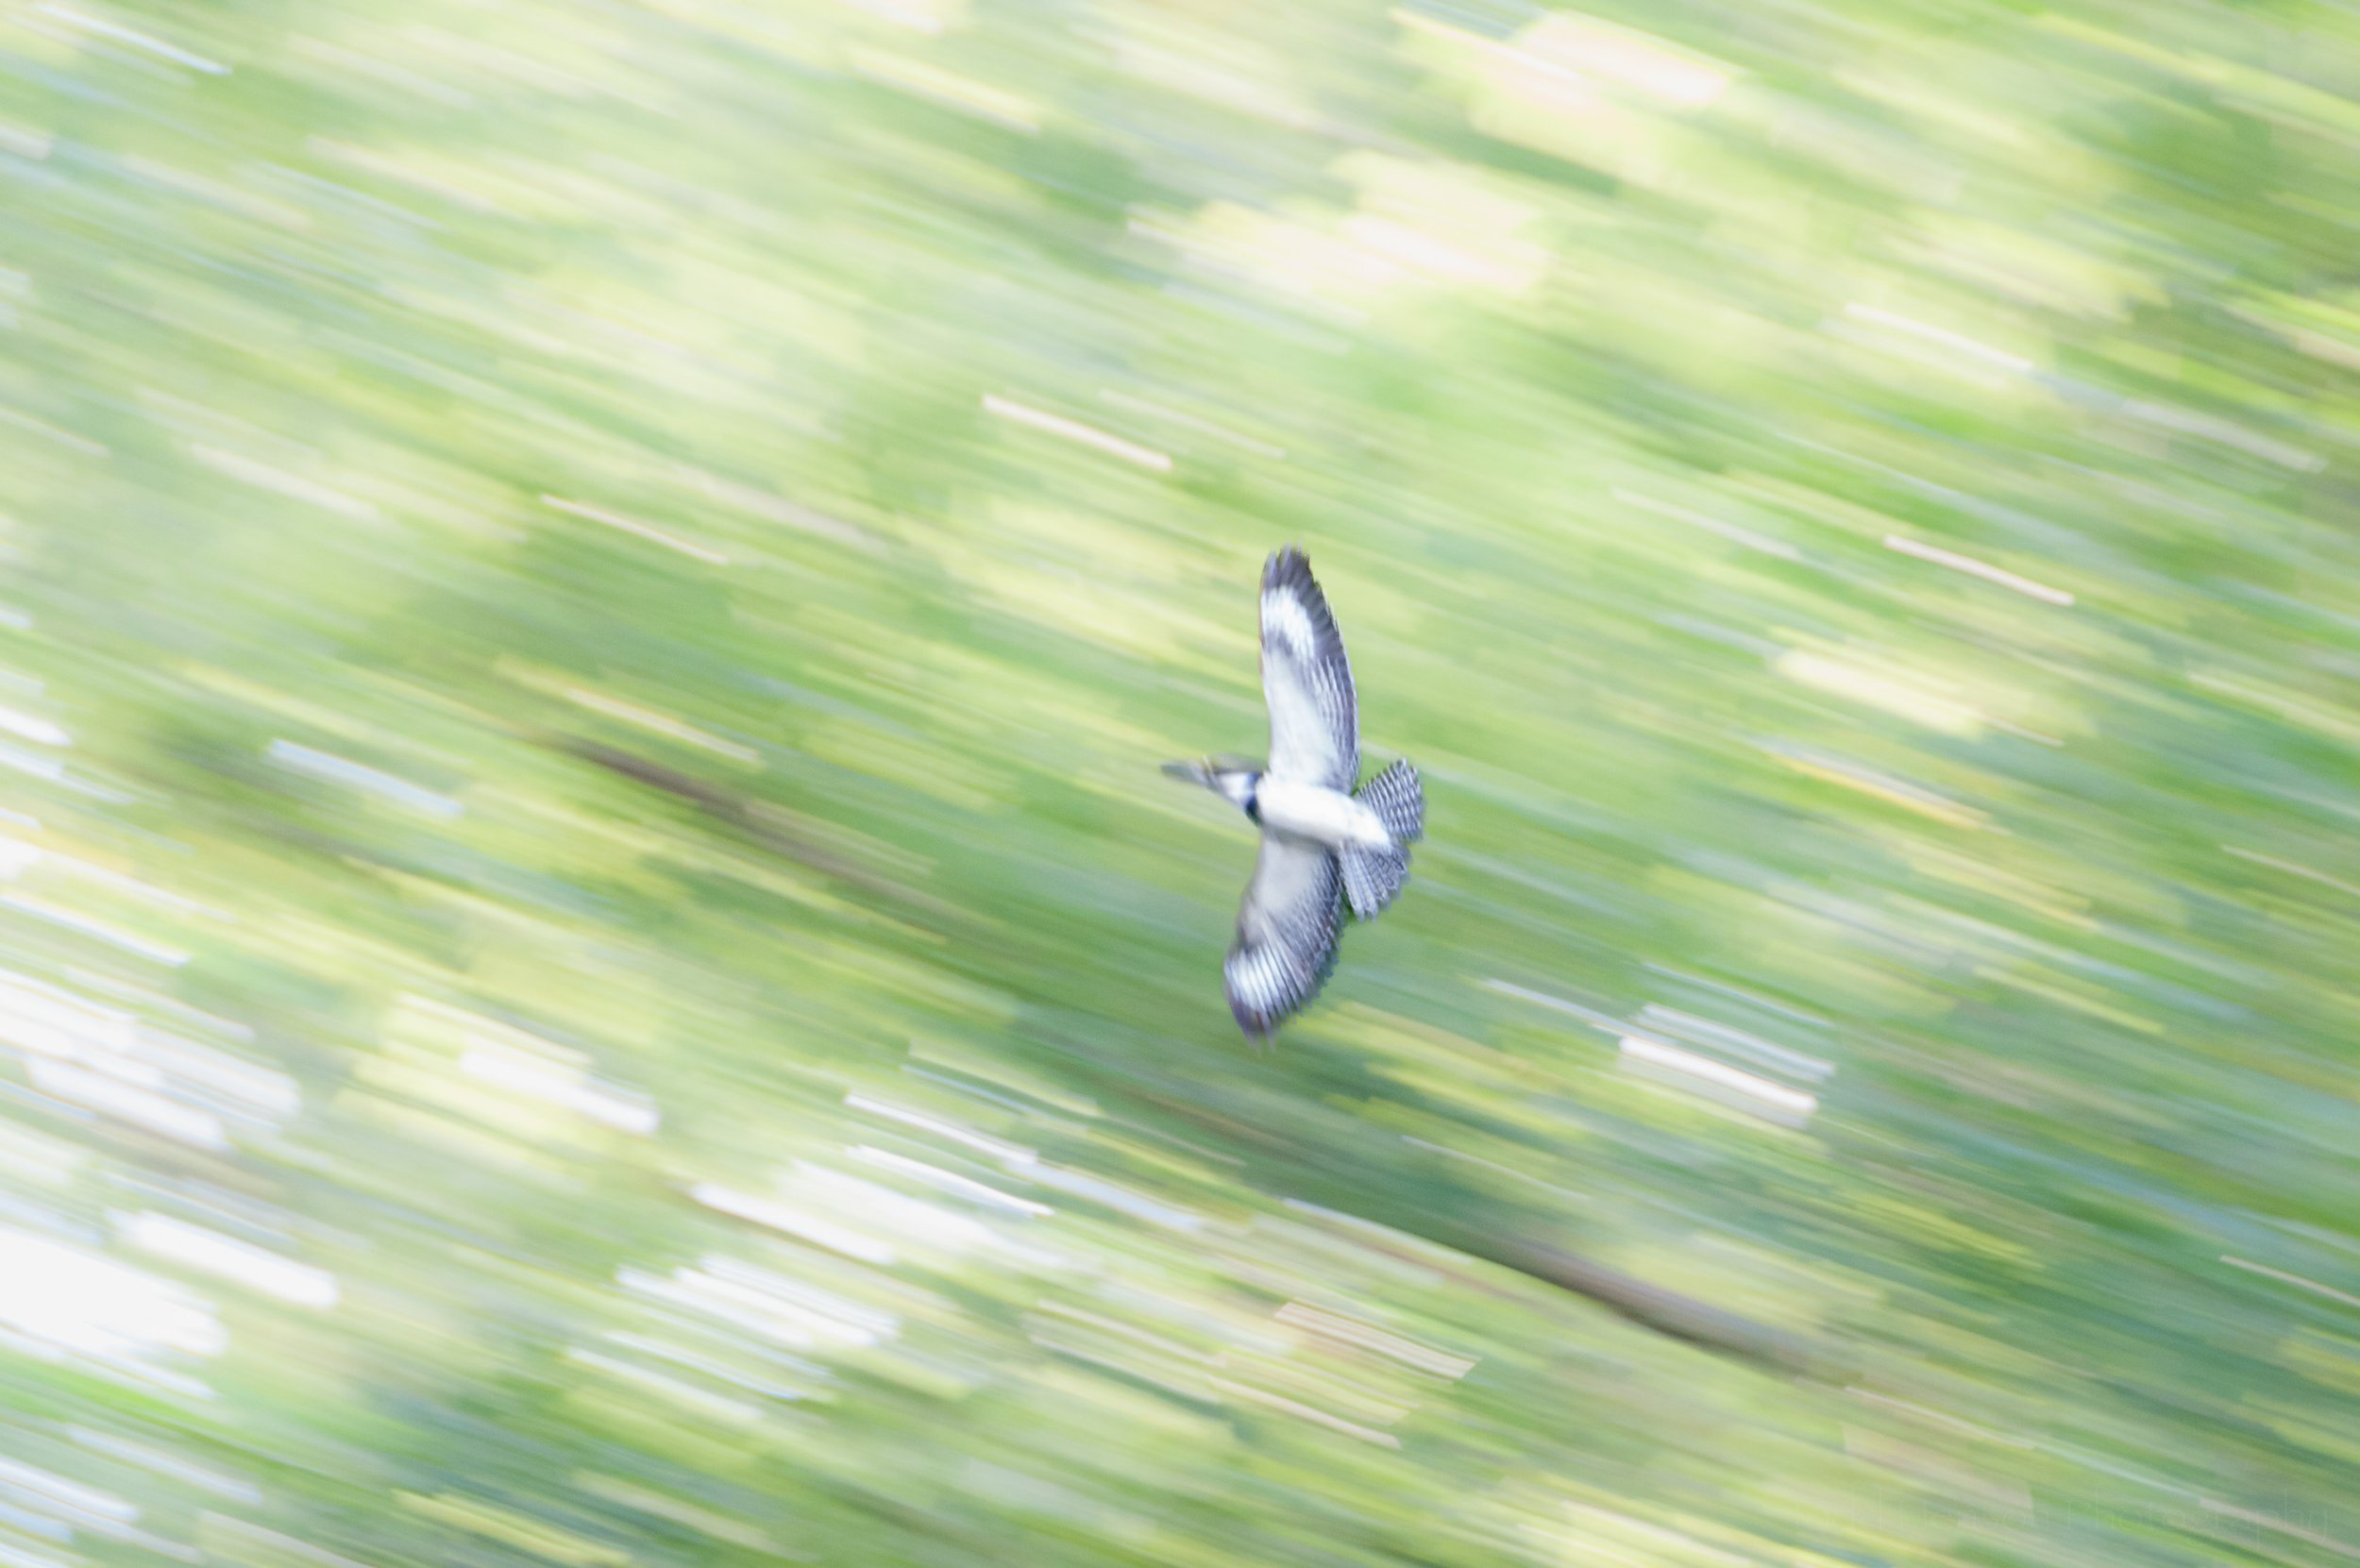
Belted Kingfisher Flyby

Sometimes paintings that look very much like real life are called photorealistic because they appear almost like photographs. Similarly, photography can be used to create more painterly images, even using techniques mostly performed in camera. Today we’ll explore one method of doing this, that of panning with a subject using long exposures to create intentional motion blur, and it doesn’t require pro-level cameras or lenses.

The Setup

On July 3, 2009, my brother and I visited Luray, Virginia and their fabulous Greenway, a beautifully maintained park system with a stream and walkway that runs through the town. In one area we heard the call of a belted kingfisher and watched as it repeatedly flew quickly upstream, and then back downstream. I had with me the kit lens that came with my camera, an 18-200 mm f/3.5-5.6 lens. In this case the 200 mm helped me get a little closer to the kingfisher, but if you photograph larger subjects or are willing to have a smaller subject then you can easily use a shorter focal length just as well.

The kingfisher was moving quickly and the light was a little subdued under the leaves of the trees. I doubted I could get nice clear photos of the kingfisher in flight, though I did initially try that, so I eventually settled on creating slightly more abstract painterly photos. I wanted the kingfisher as large as it could be so I zoomed in as far as I could to 200 mm. There wasn’t a lot of light so I knew shutter speeds would be an interesting challenge. I opened up the aperture of the lens all the way, to f/5.6 at 200 mm. I then raised my ISO to 640 to let me set faster shutter speeds. This gave me shutter speeds between 1/15 to 1/60 of a second. I could have worked in manual exposure mode and set everything, and if you want a specific look this is what you should do, but given I was panning through different areas with different light levels, and I was just having fun experimenting, I chose to work in aperture priority mode, my typical setting, where I choose the aperture and let the shutter speed fall where it may.

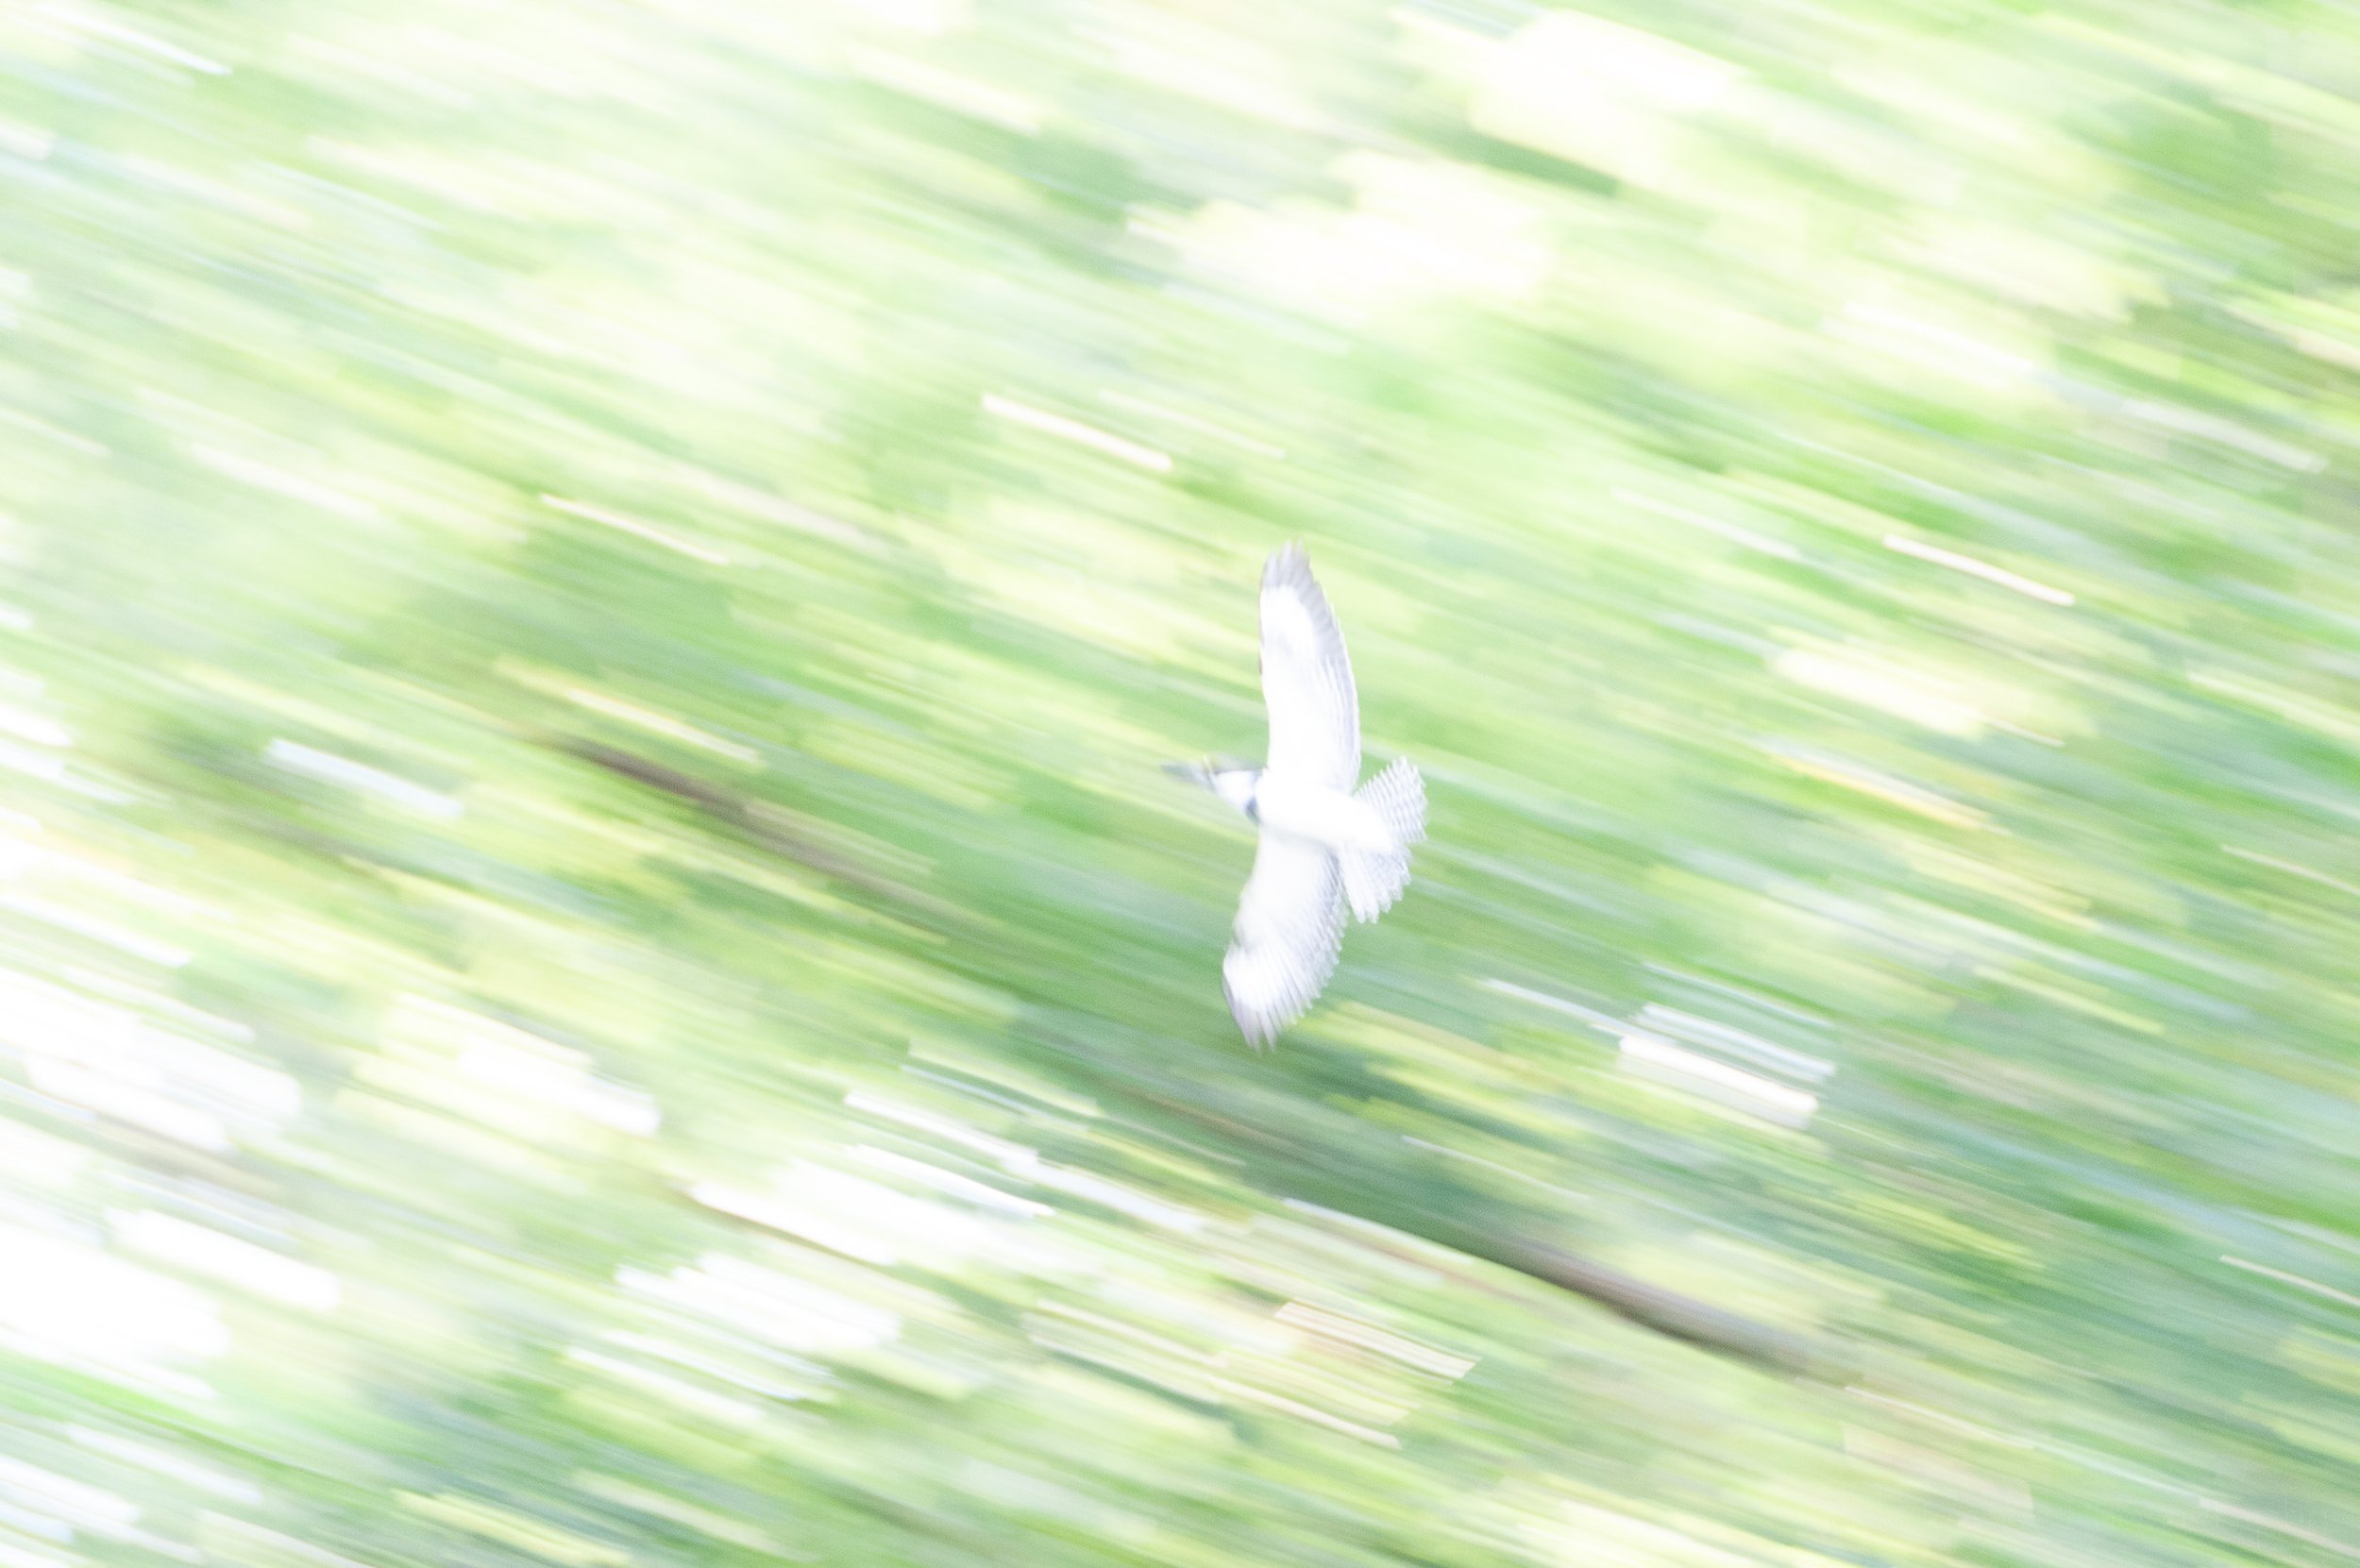
The Kingfisher Soars

Technique: Panning

So what is panning? It’s moving the camera with the subject and letting the background blur. If you see the bird coming from the left then face straight ahead and twist your body towards the left. Find the bird in your viewfinder and begin focusing. Stick with it as it flies by, pressing the shutter button in continuous mode so you create many images as it flies by, with you continuing to track it as it does, twisting your body to the right. Keep with it as it flies by to the right until it’s flown beyond your view. Hopefully, somewhere in that group of photos you’ve created a winner.

It requires a lot of experimentation to find just the right shutter speed for your subject. Do you want the subject in perfect focus, or are you willing to let the subject remain a bit blurry as I chose to here? And how fast is the subject moving? The shutter speed you need will depend on those factors, so you’ll need to practice to find what works for you in that specific instance.

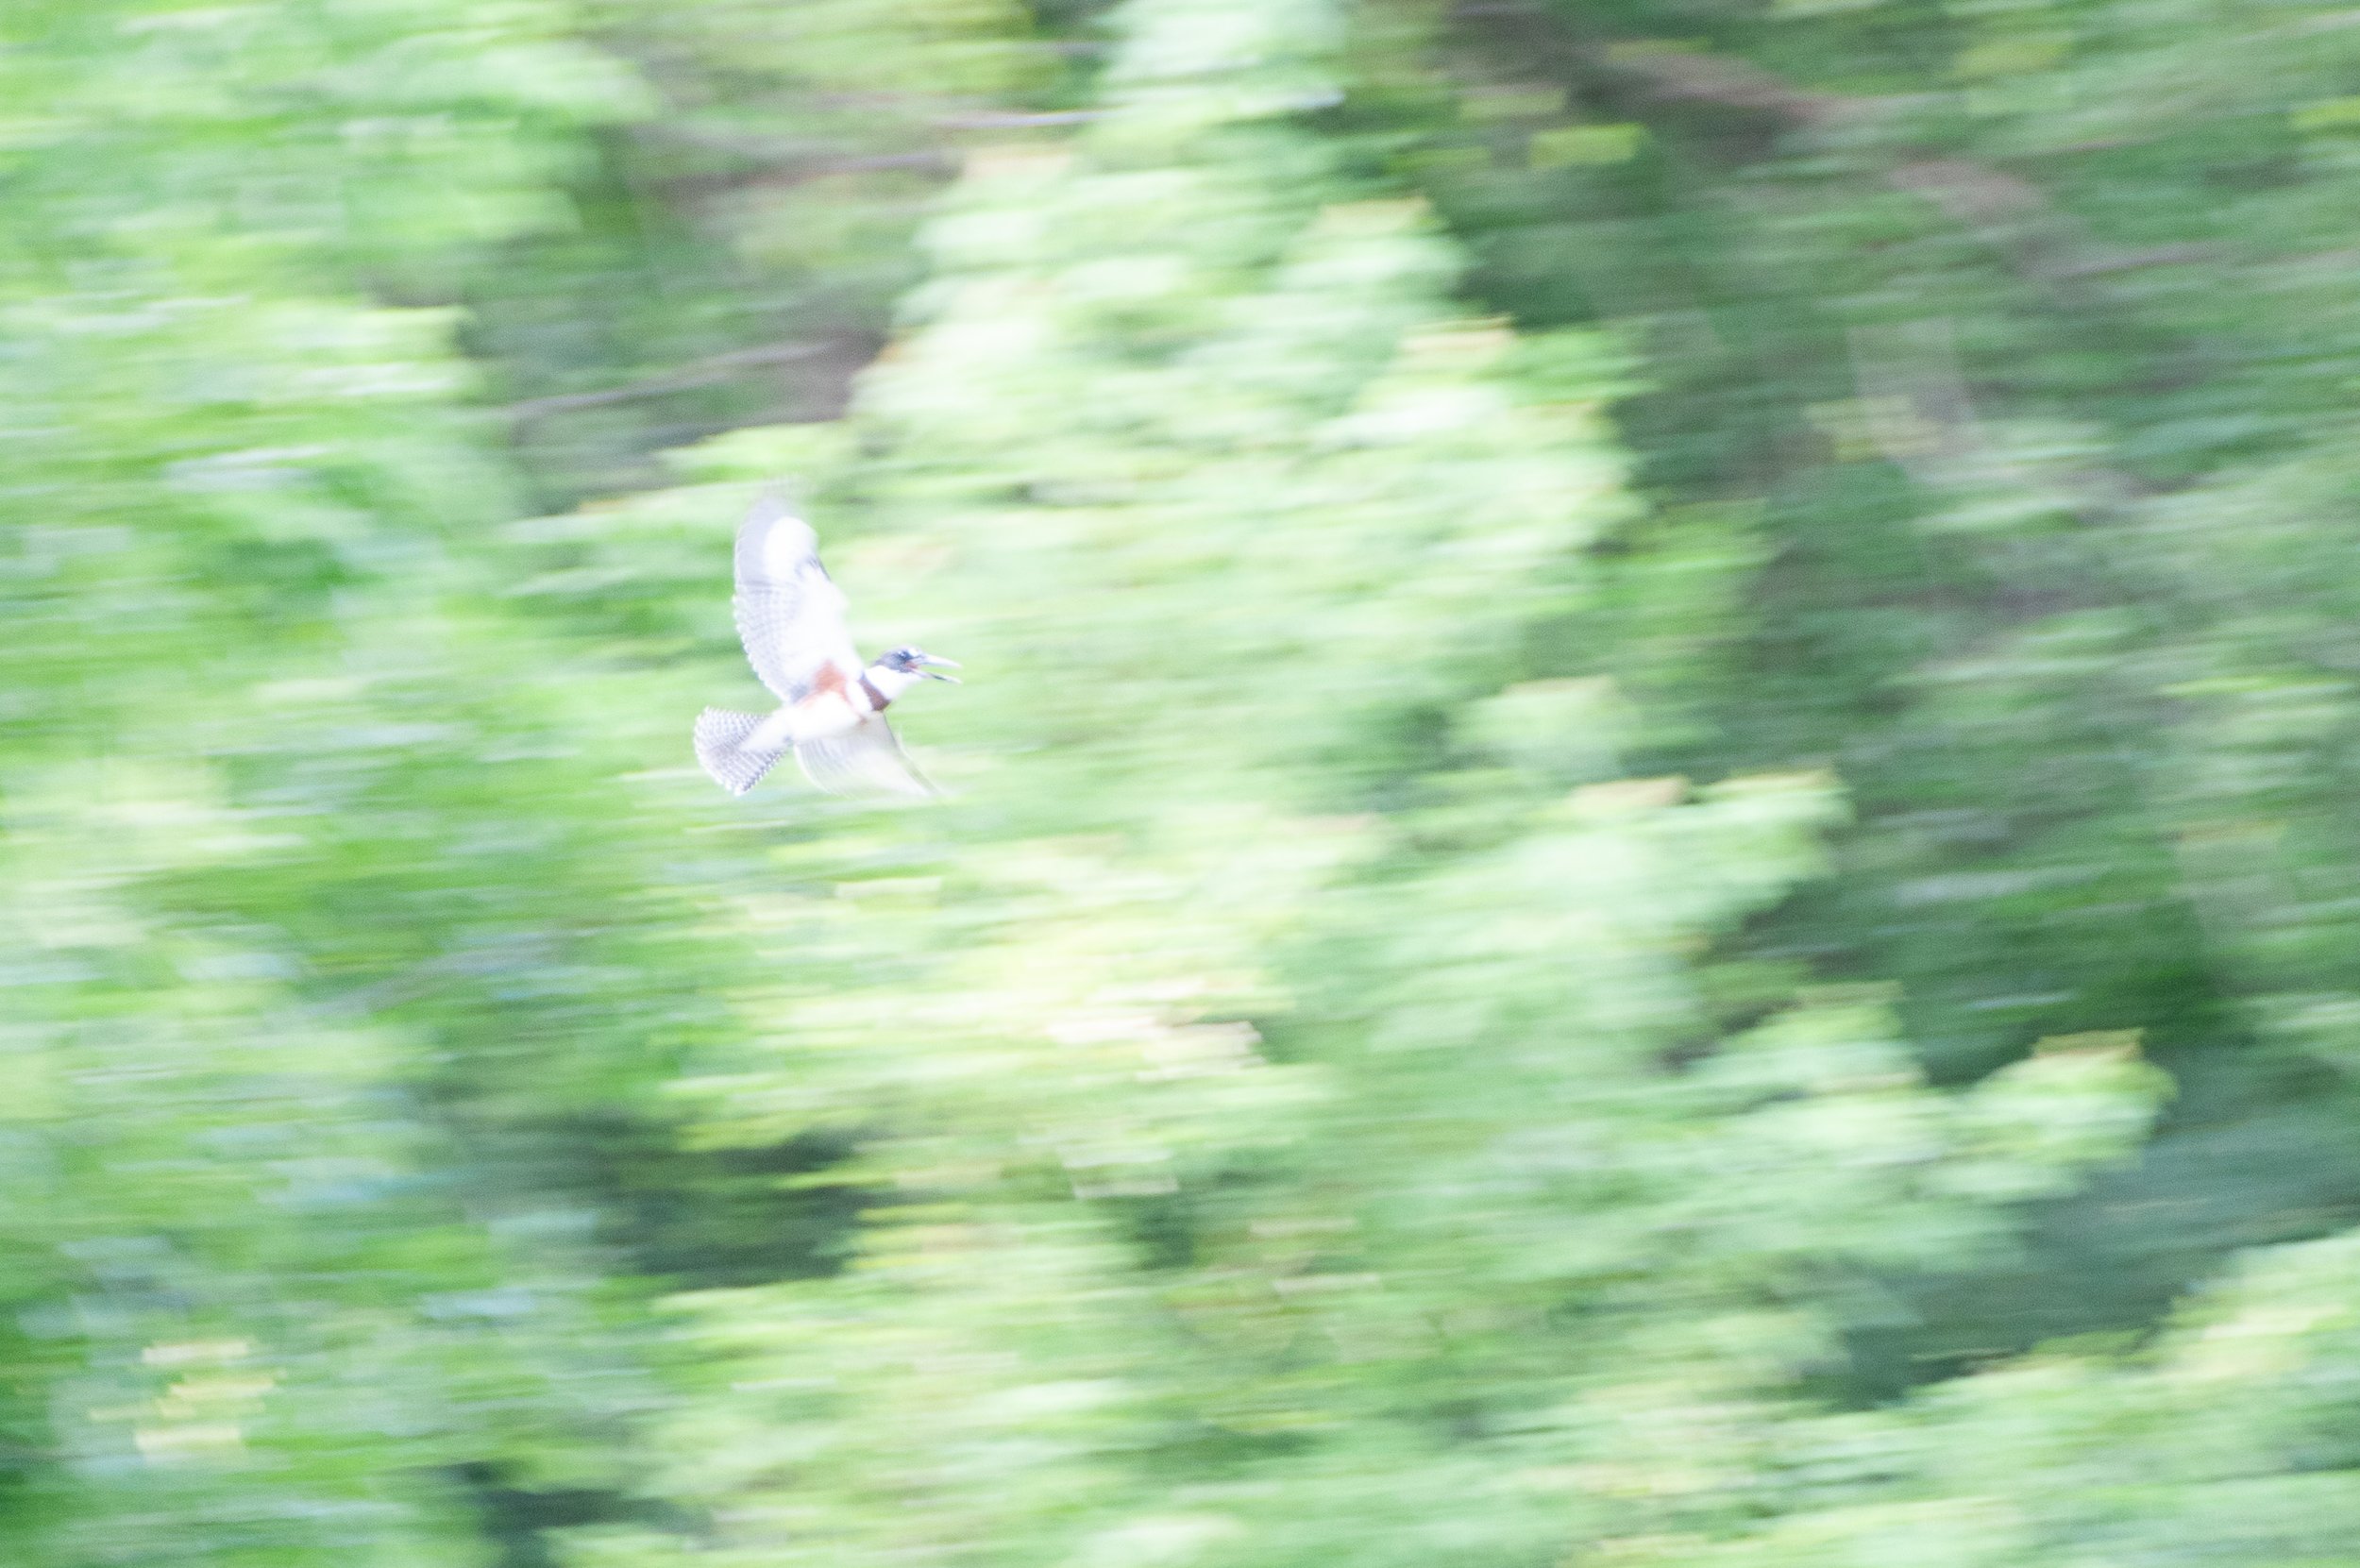
The Kingfisher Calls

Painterly Aspects

Notice how different each of the three photos here look. In the case of the first photo, Belted Kingfisher Flyby, the bird is moving very quickly so I’m panning very quickly which creates a complete blur to the background. The shutter speed is 1/15 second so there’s plenty of time for the background to blur. You can see how far the bird, and my camera, moved in that time by looking at the length of the lighter colored lines in the photo.

The second photo, The Kingfisher Soars, is similar but the bird was flying at an angle so I didn’t pan quite as fast, and I used a faster shutter speed of 1/50 second. You can see the lines of color from the background are shorter. They begin to look a little more like long paint strokes.

With the third photo, The Kingfisher’s Call, I’m now at a faster shutter speed with 1/60 second, and the bird isn’t moving nearly as fast, almost hovering as kingfishers sometimes do. Look closely at the lines of color and light in the background of the photo. See how much shorter they are? Now, perhaps, they most resemble strokes of a paintbrush. And the bird is almost in focus, or at least more so than with the other two photos.

One thing to note, you could find a fast enough shutter speed that works with both the subject movement and your ability to pan, such that you actually get the subject almost completely in focus and the background a blur. This can be a lot of fun, too. But in this case, trying for a more painterly effect, I was fine with the subject remaining a bit blurry from the motion. I thought it contributed to the look of the images.

Post-processing

So the majority of the technique is in-camera using the three basic camera settings of shutter speed, aperture and ISO. But I did do work in post after I’d downloaded the photos to my computer. I used Adobe Lightroom to adjust exposure, lessening some of the highlights, darkening some shadows, blurring the backgrounds a bit more by lowering clarity, and accentuating the kingfisher by keeping the whites of its body bright and the colors dark and bold.

Below are before and after examples of each photo showing how it looked before I began processing in Lightroom and when I’d finished so you can see what effect this had. Click on each image to cycle between before and after

Final Thoughts

So what do you think? Have you tried this before? If not, give it a go. And you don’t have to photograph a bird to do this. You can chose any moving subject, such as a car or bicycle. In fact, you don’t even have to chose a moving subject. I’ve show before how you can use this technique on landscapes to create slightly more painterly views of the world. Give it a try, and let me know how it goes.

For other examples, see A Day for Abstracts in the Forest and Turbulence in Motion.


Do you enjoy these posts?

Sign up to receive periodic emails with updates and thoughts. Don’t worry, I won’t spam you. And please consider purchasing artwork or products from my online store, and using my affiliate links in the sidebar to the right when shopping online.

I appreciate your support!

Posing Belted Kingfisher by Todd Henson

A beautiful female Belted Kingfisher posing for the camera

As you can probably tell from its name, the Belted Kingfisher is a bird that hangs out around water where it dives below the surface catching fish. They’re fairly easy to identify, having a very distinctive look, behavior, and sound. You’ll often hear them first, sometimes from a fair distance as they have a loud call. If you follow the sound you may be fortunate to see them hovering over the water or diving below it.

One interesting feature of the Belted Kingfisher is that the female is more colorful than the male, unlike most species where the male is the more colorful one. The female has a beautiful rusty band across her stomach, in contrast with the male who’s chest and stomach are white. They both have a white ring around their neck, and are otherwise blue-gray with a great little crest of feathers atop their head.

A female Belted Kingfisher flicking her tail up

A female Belted Kingfisher with her tail down

I was fortunate this particular female landed very close by, perching atop a bare snag, watching the water below. She was quiet while perched, but exhibited interesting physical behaviors, flicking her tail up and down periodically. You can see this in a couple of the photographs, one showing the tail up and the other showing it down.

These photos were created a number of years ago in mid-October at Huntley Meadows Park in Fairfax County, Virginia. It’s a fantastic wetlands park, home to many different species, and well worth a visit.


Do you enjoy these posts?

Sign up to receive periodic emails with updates and thoughts. Don’t worry, I won’t spam you. And please consider purchasing artwork or products from my online store, and using my affiliate links in the sidebar to the right when shopping online.

I appreciate your support!