Focus Stacking

Mining Bee in Its Nest by Todd Henson

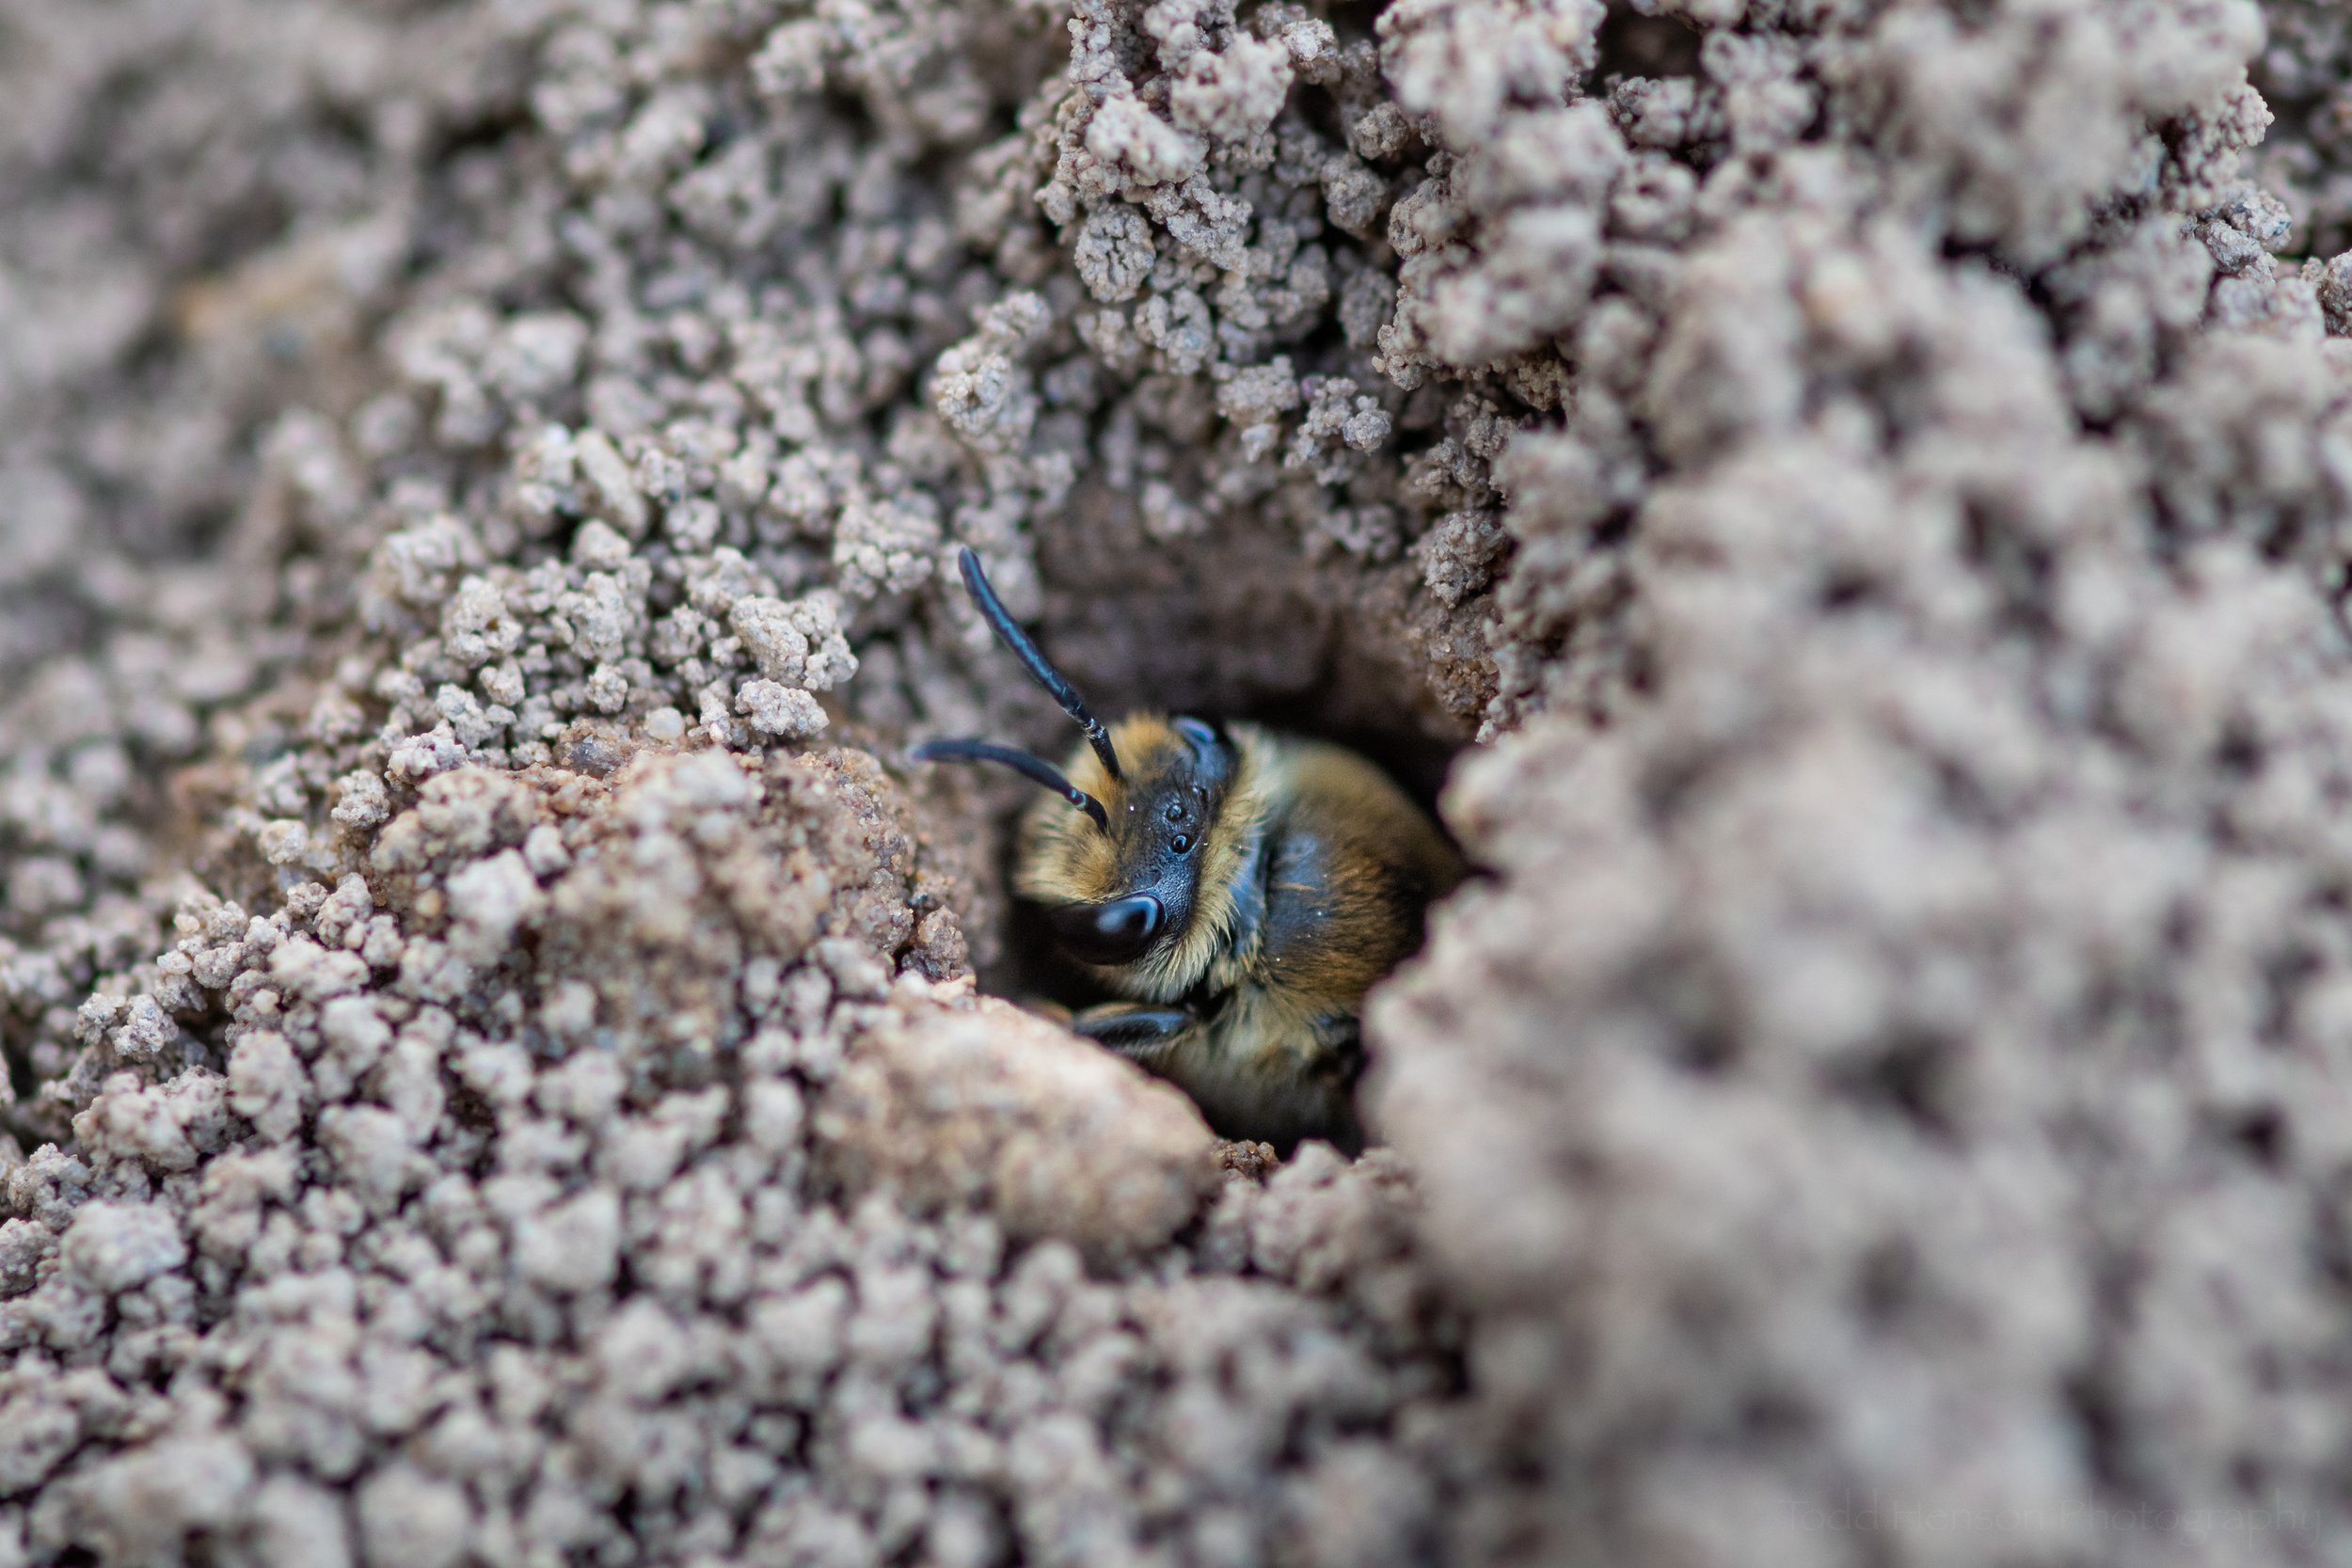
A first view of a mining bee in its nest in the ground

Mining bees are interesting little creatures. I’ve seen them in several locations. If you find them at the right time, in early spring, you may see dozens or hundreds of little holes in the ground, possibly with little mounds of dirt around them, and bees flying just above the holes. Each hole is the nest of a single mining bee. It will collect pollen and nectar and store that in a chamber in the underground nest, and it will lay an egg there. Thankfully, mining bees are not at all aggressive and the most difficult thing about them can be trying not to step on the bees or their nests when they happen to dig in the dirt of the park trail.

A closer shaded view of the mining bee in its nest

These photos show one of a large number of mining bees we found in Seven Bends State Park in Virginia on April 2nd of 2023, right on the trail. The first photo above was created in full sunlight. For the rest I shaded the nest to even out the light and shadows.

The two photos above are normal photos. But the two photos below are focus stacked, which means I took several photos of the same scene with the focus shifted just a little. I then use Adobe Photoshop to stack them together, allowing it to pick the areas most in focus from each photo. The end result, hopefully, is an image with more of the subject or scene in focus. As you can see, though, when the subject moves it can affect the focus stack. Someone with more Photoshop skills might be able to mitigate this problem, though I did find it a fascinating way of seeing the small movements of the bee while watching me from its nest.

A focus stacked view of the mining bee in its nest, attempting to capture more of the bee in focus

A focus stacked closeup of the mining bee in its nest. Notice how the antennae moved resulting in ghosted images of them.


Do you enjoy these posts?

Sign up to receive periodic emails with updates and thoughts. Don’t worry, I won’t spam you. And please consider purchasing artwork or products from my online store, and using my affiliate links in the sidebar to the right when shopping online.

I appreciate your support!


Focus Stacking Pink Lady’s Slippers in 2022 by Todd Henson

Pink Lady’s Slipper (2022). This photo is the result of focus stacking 9 images to try to capture a significant portion of the bloom in focus.

One of the goals I had this season was to create a nice closeup photograph of one of our local orchids, the pink lady’s slipper, with an uncluttered out of focus background but showing a maximum amount of the blossom in focus. In the past I’ve tried this by experimenting with apertures to try to balance the amount of the blossom in focus against the amount of the background that’s out of focus. It’s been a challenge with many of the flowers I’ve found locally as they so often grow in very busy and brushy areas. So this year I decided to try using the focus stacking technique to accomplish my goal. This is a technique I’ve only rarely used, so I’m not an expert and am still learning.

Technique: Focus Stacking

Focus stacking refers to making many photographs of the same subject, one right after the other, while shifting the focus point for each photograph. In this case I used a very wide open aperture to keep the background nicely blurred. Then I focused on the closest point on the flower and made an image. Then I shifted the focus back just a little and made another photo, and repeated this until I was focused on the back of the flower. Essentially, each photo has a slice of the subject in focus and when you combine all of them in software you will, hopefully, get the entire subject in focus.

I’m not going to go into lengthy detail on the specifics of how to do this in software, but at a high level I did the following:

  • Selected all the individual photos in Lightroom and chose to edit as layers in Photoshop.

  • Selected all the layers in Photoshop, then auto-aligned the layers to line them all up correctly in case there was any slight movement between shots.

  • Auto-merged the layers, choosing the focus stacking option, to combine them all letting Photoshop pick the areas most in focus from each image.

  • Cropped the final merge to get rid of any inconsistent areas around the edges.

  • Performed any final edits in Lightroom.

The two photos I share today are examples of how I did. They are not perfect merges, though I am reasonably happy with the results. I’m ok with some things being a little out of focus but there are small areas of pink on each flower that I’d hoped would be in focus and are not. At some point I may spend more time on each to see if I might have captured those areas in focus in some of the images but the software just didn’t merge them correctly, and if so I would need to manually adjust the layers after the merge to try to capture those areas in focus. Or it’s also possible I just moved the focus a little too far such that I missed a slice, in which case I’ll need to try again next season.

Another Pink Lady’s Slipper (2022). This photos is the result of focus stacking 14 images, resulting in a 3.01 GB file.

Lessons Learned

  • If you are shooting with a wide open aperture and are close to your subject then adjust the focus in very small increments to assure you capture the entire subject. You can’t always go back and redo this later.

  • Try to pick days where there’s no wind, or at least very little. You don’t want the subject moving between each shot.

  • Use a sturdy tripod. Software can align the photos if they are not all perfectly aligned, but why risk problems? Use a tripod and get the shots as steady and lined up as possible while in the field.

  • Consider what software to use. I used Adobe Lightroom and Photoshop to perform all processing. This is a great combo but sometimes there are third party software packages that might do a better job with specific tasks. I’ve heard good things about Helicon Focus when it comes to focus stacking, but I’ve never tried it.

  • Consider how much memory and processing power this might take. I’m still working from a fairly old computer (12 years old) and this process did tax it. It became so memory constrained at times that the entire process seemed to stall and likely took far longer than it would on a more recent computer (I’ve been recently thinking about finally getting a new one).

  • Consider how much hard drive space this might take. Granted, space is relatively cheap in the scheme of things, but just realize that combining 14 images created on a 20 megapixel camera can result in a 3 GB merged file. If your subject requires even more images then the size will grow even larger.

  • Practice, practice, practice.

Conclusion

Focus stacking is a great technique that can help you create images that surpass the capabilities of whatever camera and lens you own. You can create very shallow depth of field photographs but still capture maximum detail in the specific areas you want. Modern software makes it relatively painless in most cases to create some nice images, but it can still take a little work, and it does help to practice the technique to better your skills and increase the chances of creating a final photo that exceeds your expectations.


Do you enjoy these posts?

Sign up to receive periodic emails with updates and thoughts. Don’t worry, I won’t spam you. And please consider purchasing artwork or products from my online store, and using my affiliate links in the sidebar to the right when shopping online.

I appreciate your support!


Focus Stacking Flowers by Todd Henson

The final image, after focus stacking 9 images in Photoshop. Notice how each foreground flower is in focus.

I’ve just begun experimenting with the focus stacking technique in Photoshop. Focus stacking is used when you’re not able to capture everything you desire in the photo in sharp focus. To get around this limitation you make multiple exposures with identical settings, shifting the focus in each exposure. For example, if you have a landscape photo of a shell on a beach very close to the camera and a cliff in the far distance, perhaps you can’t get both shell and cliff in sharp focus. So you take at least two photos of the scene, one with the shell in sharp focus and another with the cliff in sharp focus, and then merge those exposures in Photoshop. Photoshop will allow you to combine the most in focus parts of each exposure into a single image.

In this particular experiment I was attempting to capture a number of small flowers in the forest, having each flower in focus but keeping the background out of focus. On my camera I set the ISO to 400, the aperture to f/5.0, the shutter speed to 1/40 second, and made sure the white balance was not on auto. I wanted the same settings for each exposure. I chose an aperture of f/5.0 to have a little depth of field in each exposure but keep the background blown out nicely. Then I focused on the closest flower, made an exposure, set the focus a little deeper into the frame, made another exposure, and continued this until I thought I had captured detail in all the flower parts of the image I was interested in. I made a total of 9 images.

From Lightroom I selected all 9 images, right-clicked and chose Edit In, then selected Open as Layers in Photoshop. This imported all the images into Photoshop as separate layers.

Once in Photoshop I needed to align the images. I had the camera mounted on a sturdy tripod and was using a cable release, but these were close-up images taken with a macro lens and I had no way to stop any swaying of the flowers that might occur. Thankfully Photoshop is really good at automatically aligning images. To do this I selected all the layers then clicked Edit and Auto-Align Layers. I chose the Auto setting in the Auto-Align Layers dialog. This took a bit of time. When it finished I cropped in just a little to assure I had clean edges.

The next step was to stack the images and have Photoshop choose the portions of each image that were most in focus, hence the term focus stacking. Once again I selected all the layers, clicked Edit and Auto-Blend Layers. I chose Stack Images and checked Seamless Tones and Colors in the Auto-Blend Layers dialog. This step took some time and was where most of the magic was performed. When Photoshop was finished I had a layer mask associated with each layer. It was interesting to click on each layer and see which portions of the image Photoshop chose to include. I saved the image and moved back into Lightroom to perform a little more tweaking.

I did notice that, as good as Photoshop is at choosing what to keep in the image, it is not perfect. There are some strange blurred areas on the petals at the top of the image, and the spider web with dew on the left side has a distinctly darker area around it. I don’t yet know how to fix these small areas, but will eventually. I’m always trying to learn more. Overall, I’m pleased with the process. It did a good job of allowing me to focus on multiple flowers, something I might not have been able to with a single image straight out of the camera.

Give focus stacking a try sometime. It can be one more tool to help you realize your creative vision.


Do you enjoy these posts?

Sign up to receive periodic emails with updates and thoughts. Don’t worry, I won’t spam you. And please consider purchasing artwork or products from my online store, and using my affiliate links in the sidebar to the right when shopping online.

I appreciate your support!