HDR

Washington's Birthday / President's Day by Todd Henson

Low angle view of the Washington Monument and the Reflecting Pool during the blue hour before sunrise.

Washington’s Birthday, also often called President’s Day, is a United States holiday recognizing George Washington, the first President of the United States, and the man who led this country through the Revolutionary War. He is considered the Father of the Country. George Washington was born on February 22nd, 1732. The holiday is celebrated the third Monday of February.

Vertical photo of the Washington Monument and a clear blue sky.

The day is considered President’s Day by many states, some to also honor Abraham Lincoln, the 16th President of the United States, and known as the Savior of the Country for his part in bringing an end to the Civil War and starting the healing and reconstruction that followed. He was born on February 12th, 1809.

To celebrate these birthdays I’m sharing a selection of photographs of the Washington Monument and Lincoln Memorial in Washington, D.C., which were built to honor these two United States Presidents.

The Washington Monument is a 555-foot marble obelisk located on the National Mall. If you draw lines from The White House and the US Capitol the Washington Monument resides at their intersection. It is very easy to locate from anywhere nearby. When it was completed in 1884 it was the tallest building in the world.

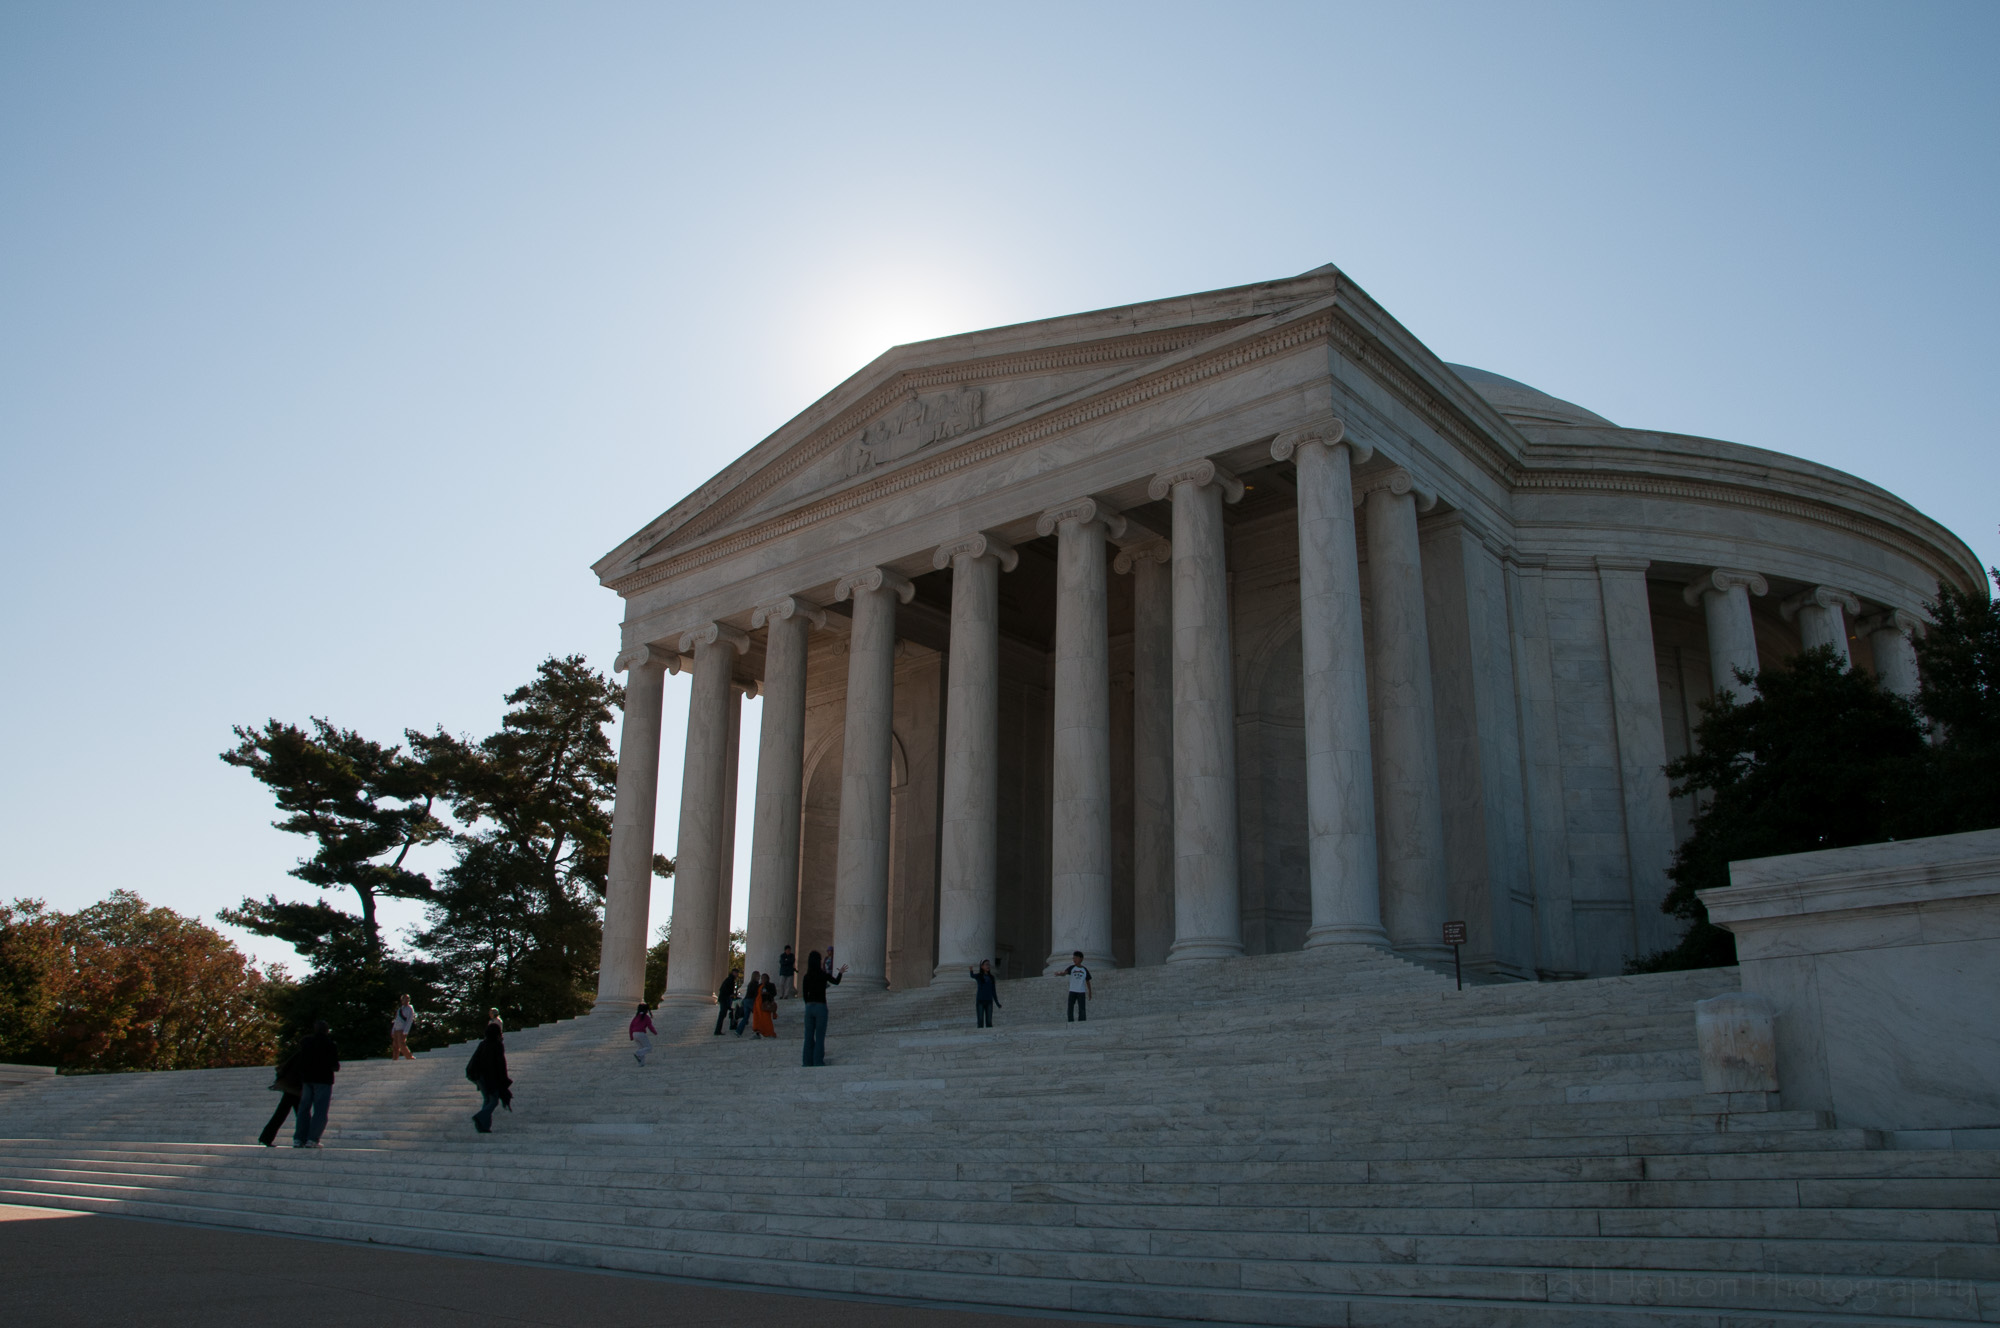
The Lincoln Memorial is located at the west end of the National Mall. It is a distinctive rectangular building with vertical columns all around it, and a statue of a seated Abraham Lincoln inside, visible from between the front columns. This memorial was completed in 1922.

Lincoln Memorial before sunrise.

With the completion of the Lincoln Memorial in 1922, the east/west vista of the National Mall nearly was complete. The Reflecting Pool would be finished shortly thereafter and the visual connection between the Father of the Country and the Savior of the Country would be fulfilled.
— National Park Service

Black & white photo of the statue of Abraham Lincoln inside the Lincoln Memorial.

All but one of the photos in this post were created before sunrise on a cloudy day. This kept the background of Lincoln’s statue dark, as no light was leaking in from outside. And the two photos of the lit Washington Monument and the Reflecting Pool were creating during the blue hour, just before the sun begins to rise. You can see in these photos why it's called the blue hour.

One Capitol Morning: National World War II Memorial, bottom portion of Washington Monument, and US Capitol, all lined up with flags waving. (5 image HDR)

The photo above, One Capitol Morning, can be purchased as wall art or on a variety of products.

In the photo above I only showed the lower portion of the Washington Monument, but also included the US Capitol building in the distance and the National World War II Memorial in the foreground. There was enough wind to keep the flags extended, which adds a really nice touch. And the warm glow of color in the sky shows it was just before sunrise. You can see some early morning joggers and walkers on some of the paths. I used a telephoto lens at 200mm to compose the image, compressing the distance, allowing everything to appear closer together than it really is. I used an aperture of f/22 to assure everything was in focus, from the closer WWII Memorial to the distant Capitol building. The photo is actually a high dynamic range (HDR) image built from 5 separate photos with shutter speeds ranging from 1/8 to 1/60 of a second. The slower shutter speeds in some of the images is what causes the little bit of motion blur in some of the flags and people. I created the 5 exposures and processed them into an HDR to allow for a decent exposure on the buildings and memorials and to capture what color was left in the sky.

The vertical photo of the Washington Monument was created a little later in the morning, after the sun had fully risen, on a different day when the sky was clear of all clouds. I find it interesting to compare the flags in this image with that of the Washington Monument, US Capitol, and WWII Memorial. In the other image the wind was strong in a single direction, with all the flags fairly uniformly displayed. Whereas, the vertical image of the Washington Monument shows flags in a number of different directions from a more inconsistent wind. Little things like this can greatly affect how a finished image will look, so always stay aware of the weather and the changing environment.

Another view of the lit Washington Monument and Reflecting Pool during the blue hour. This photo was created a few minutes after the one at the top of the post, notice the sky has lightened a bit.


Do you enjoy these posts?

Sign up to receive periodic emails with updates and thoughts. Don’t worry, I won’t spam you. And please consider purchasing artwork or products from my online store, and using my affiliate links in the sidebar to the right when shopping online.

I appreciate your support!


Maine Narrow Gauge Railroad Company & Museum by Todd Henson

Working engine outside the Maine Narrow Gauge Railroad Co. & Museum (7 image HDR)

While visiting Portland, Maine, my father and I stopped at the Maine Narrow Gauge Railroad Company & Museum, off Fore Street, just down from the Portland Ocean Gateway, where cruise ships dock off Casco Bay. This was a small, but very interesting museum that also included a ride on their narrow gauge train.

Serenade of the Seas docked in Portland, Maine, with statue of George Cleeve (5 image HDR)

The ride began at the museum, where we had good views of Serenade of the Seas, a large cruise ship at dock. The train took us down to the Portland Ocean Gateway, where passengers from the cruise ship would enter and exit Portland. Some of the folks on the train were from the ship.

From the dock area the train reversed direction, passed by the museum, and then along the coastline paralleling the Eastern Promenade Trail, through Fort Allen Park. Around Fish Point we had very foggy views of Fort Gorges in the bay. One minute we could see the Fort, the next it was obscured in fog.

The train continued past East End Beach where we saw someone swimming in the cold water, and through the Eastern Promenade, stopping at the old railroad bridge. We were able to disembark from the train and walk around the area. The old bridge had crossed the water to the right side of the Burnham & Morrill Company factory, known for their B&M Baked Beans.

Looking through planks at old railroad bridge with Burnham & Morrill Company factory on distant shore

Old railroad bridge with Burnham & Morrill Company factory on distant shore

After we boarded the train it made its way back through the parks along the Eastern Promenade to the museum grounds. The view continued to change the entire ride, fog moving in and out. Some of the folks on the train were annoyed by this, but I found it fascinating to watch and photograph.

Luggage display in the Maine Narrow Gauge Railroad Museum

Interior of passenger train with stove (3 image HDR)

After the train ride we spent some time in the actual museum. It was small, but had a lot packed in the small space, including several full size narrow gauge train cars we were able to walk through.

There wasn’t a lot of light in the cars, but their interiors were very interesting, so I did the best I could to capture what I was seeing. I had to hand hold the camera since I didn’t have the tripod with me, so I raised the ISO on my camera to let me use faster shutter speeds, and captured a number of image sequences where I adjusted the exposure (shutter speed) between each image, holding the camera as still as possible between them.

I knew I would take each image sequence and combine it into a single high dynamic range (HDR) image, where I could better show the interior as I saw it. The camera just wasn’t capable of capturing what my eyes could see. One day cameras may have better dynamic range than our eyes, but for today we need to either decide what we want to compromise on, or capture multiple images and merge them into HDR. I don’t use this technique often, but it is fun and useful every once in a while. I worked to keep the images looking as natural as I could, trying to avoid the over-processed look of many HDR images.

Another interior of passenger train with stove (3 image HDR)

Interior of passenger train with individual seats (3 image HDR)

Horizontal view of passenger train interior (3 image HDR)

When we visited the museum it was located in Portland, but they told us it would soon be relocated to the town of Gray. If you’re interested in visiting be sure to check the Maine Narrow Gauge Railroad Co. & Museum website for the current status and location.

Train engine inside Maine Narrow Gauge Railroad Museum


Do you enjoy these posts?

Sign up to receive periodic emails with updates and thoughts. Don’t worry, I won’t spam you. And please consider purchasing artwork or products from my online store, and using my affiliate links in the sidebar to the right when shopping online.

I appreciate your support!


Travel Photography: The Complete Guide with Ben Willmore by Todd Henson

Entrance to the United States Botanic Garden

I received a free copy of Travel Photography: The Complete Guide for review. This post contains affiliate links and I will be compensated if you make a purchase after clicking on my links. This is at no extra cost to you.

Would you like to improve your travel photography? Would you like some tips and resources for planning out your next trip, knowing what gear to bring, and knowing what to photograph when you arrive? Are you new to, or could you use a refresher in, Lightroom and Photoshop and how they can be used to process your photographs into the impactful images you imagined when you were on your trip?

Ben Willmore has travelled all over the world. He has seen and photographed many fascinating and beautiful locations. He has made mistakes and learned from them. In his CreativeLive class, Travel Photography: The Complete Guide, he passes on the lessons he’s learned. He shares tips on making the most of your trip and capturing the best images you can. And he discusses many topics on how to organize and process the images you’ve created after you return home.

Capturing Your Best Travel Images

To help you make the most of your trip Ben covers:

  • Planning your trip

  • What gear to bring

  • What types of images to create

  • How to handle tourists in your images

  • Looking for unique cultural images

  • Capturing location information

  • Tips for great compositions

  • Key differences between wide angle and telephoto lense

How to handle tourists and other people in images

Look for unique cultural images

Processing to Perfection

The class also covers many topics specific to Lightroom and Photoshop. It’s not a full beginners class on these tools (though Ben has classes to fill that role), but Ben does cover a large range of topics that are likely to benefit any travel photographer. Some of the techniques are very basic, such as using Lightroom adjustment sliders, but others are more advanced techniques that can really help your images stand out. He covers topics such as:

  • How to organize your images in Lightroom

  • How to find any image quickly using keywords

  • How to create HDR images

  • How to create stitched panoramas

  • How to use Lightroom’s adjustment tools

  • When to use Lightroom and when to use Photoshop

  • How to use masks in Photoshop

  • How to process composite images in Photoshop

  • Advanced panorama techniques in Photoshop

  • Removing tourists in Photoshop

Thomas Jefferson Memorial, Washington, D.C. This is an HDR image created from the 5 images below.

How to Use the Class

One thing I really enjoyed about this class was how Ben was not dogmatic about you doing things his way. He has tried different techniques and learned pros and cons of various methods, and he passes on that info. He shows you his process and, most importantly, describes his reasoning. You may have valid reasons for doing things differently and that’s fine. Take what you learn from him, find the pieces that resonate with you, and integrate those into your workflow.

Capture location information

I was fascinated by his system of organizing images and his method for quickly knowing the status of any image, whether it was yet to be processed, was still being processed, or was finished and ready for sharing or publishing. I plan on re-watching those sections and using some of his techniques to improve my own workflow. I began as an Aperture user, and I’m still learning my way around Lightroom and, most especially, Photoshop. I learned a lot of useful lessons from Ben and hope to make use of them in the future. In fact, one huge lesson was the importance of organizing keywords and how this can save so much time in the future when searching for images. And using his importable set of keywords saves so much time now when getting started.

Travel Photography: The Complete Guide is over 10 hours of video content. But it also includes a really nice selection of extra content if you purchase the class, things like Ben’s Lightroom presets, some of his Lightroom actions, a very well organized starter set of importable keywords to better organize your images, practice images to work on, and a number of different PDF guides including a 74 page Travel Photography Handbook that serves as a great reference to everything covered in the class, and a nice Travel Photography Mobile Guide that’s suitable for keeping with you on mobile devices, offering 35 pages of short tips to help you create interesting and pleasing images while on travel.

If you're new to CreativeLive, give them a try. They live stream classes on a large range of topics, all for free online, and they are constantly rebroadcasting previous classes. So you can try their content out before purchasing anything. If you enjoy the class you can purchase it, which allows you to stream it again in HD anytime, or even download HD videos to your computer to watch offline. Many classes come with extra content available if you purchase. I've been very impressed with the photographers who've taught classes on CreativeLive, folks like Art Wolfe, Tom Mangelsen, Frans Lanting, John Greengo, Ian Shive, Chris Burkard, Marc Muench... you get the idea. These are very talented photographers who are also very skilled at teaching their craft. And CreativeLive offers classes on more than photography. Check them out!